Return to All Articles
Article Sections
1. Getting Started
2. Leads
3. Library
4. Sales Template
5. Estimate
6. Proposal
7. Invoice
8. Change Order
9. Organization Management
10. Team Management
QuickStart Guide
Create your first lead, estimate, proposal, and invoice — all in one simple walkthrough.
By Erro Support | 01/25/2026
1. Create a Lead
Start by going to the leads page and clicking 'Create Lead'.

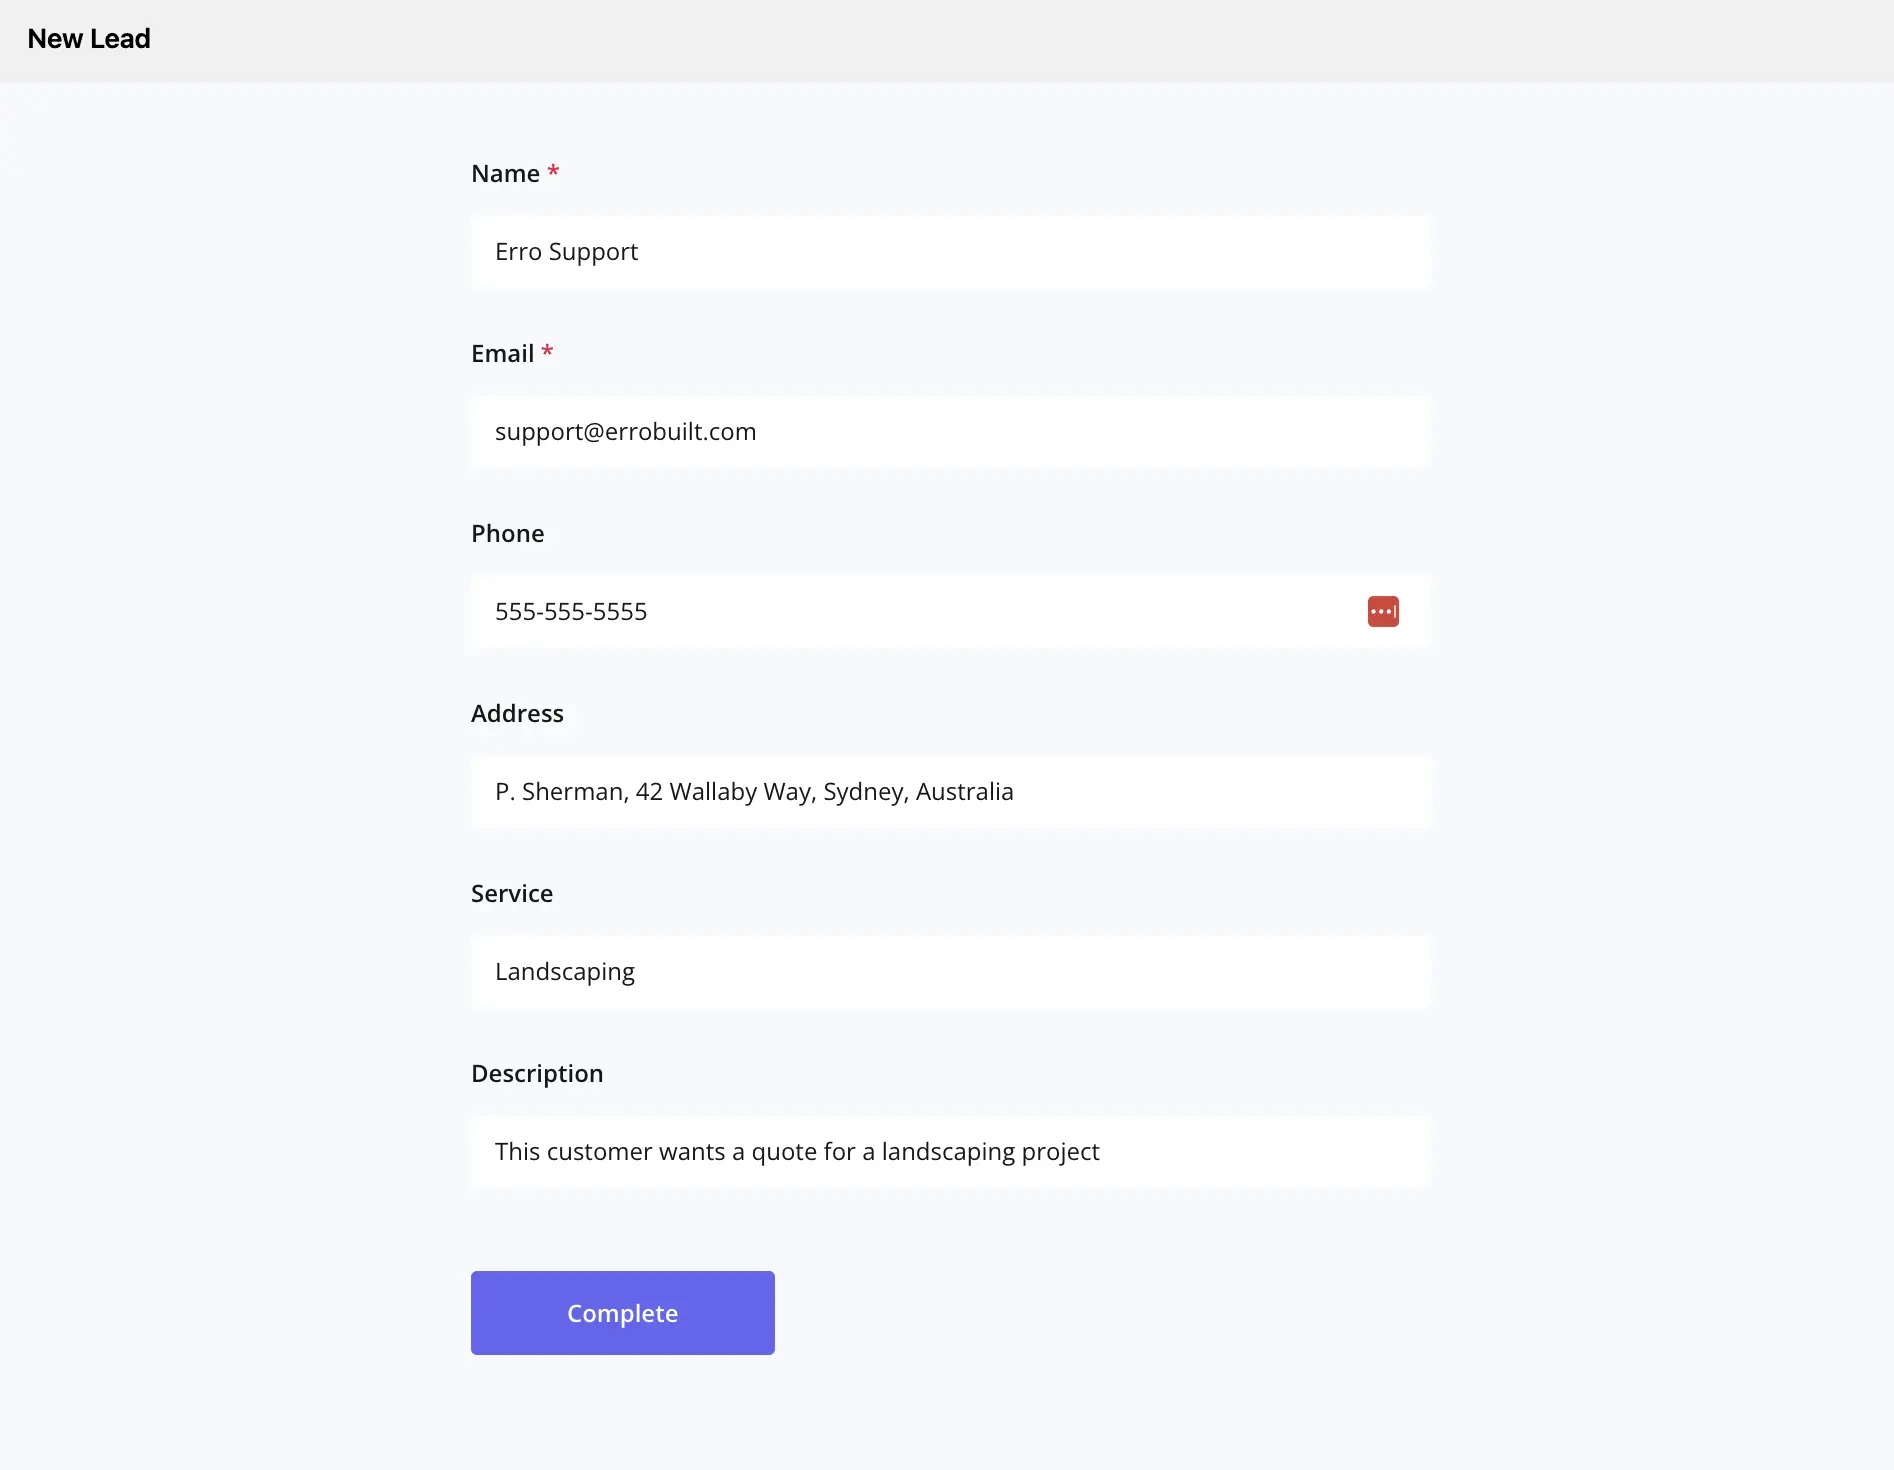
2. Enter Lead Information
Fill in the lead's details such as name, contact information, and source.
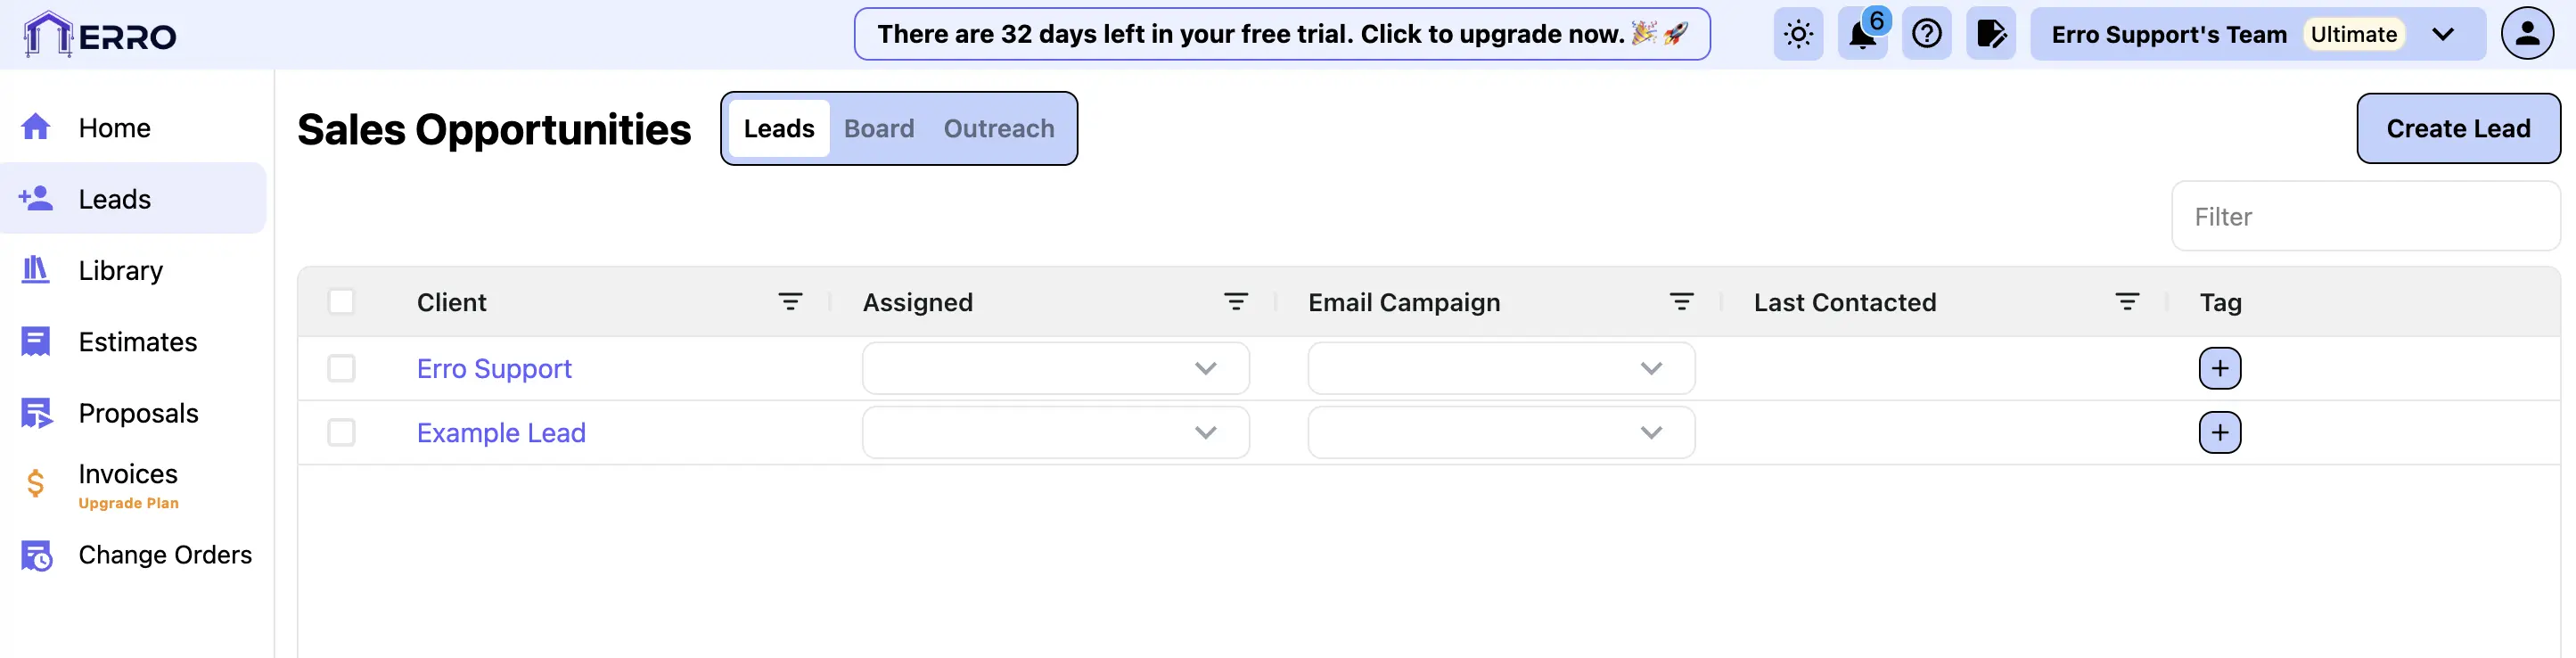
3. See Completed Lead
After entering all necessary information, save the lead to see it in your leads list.
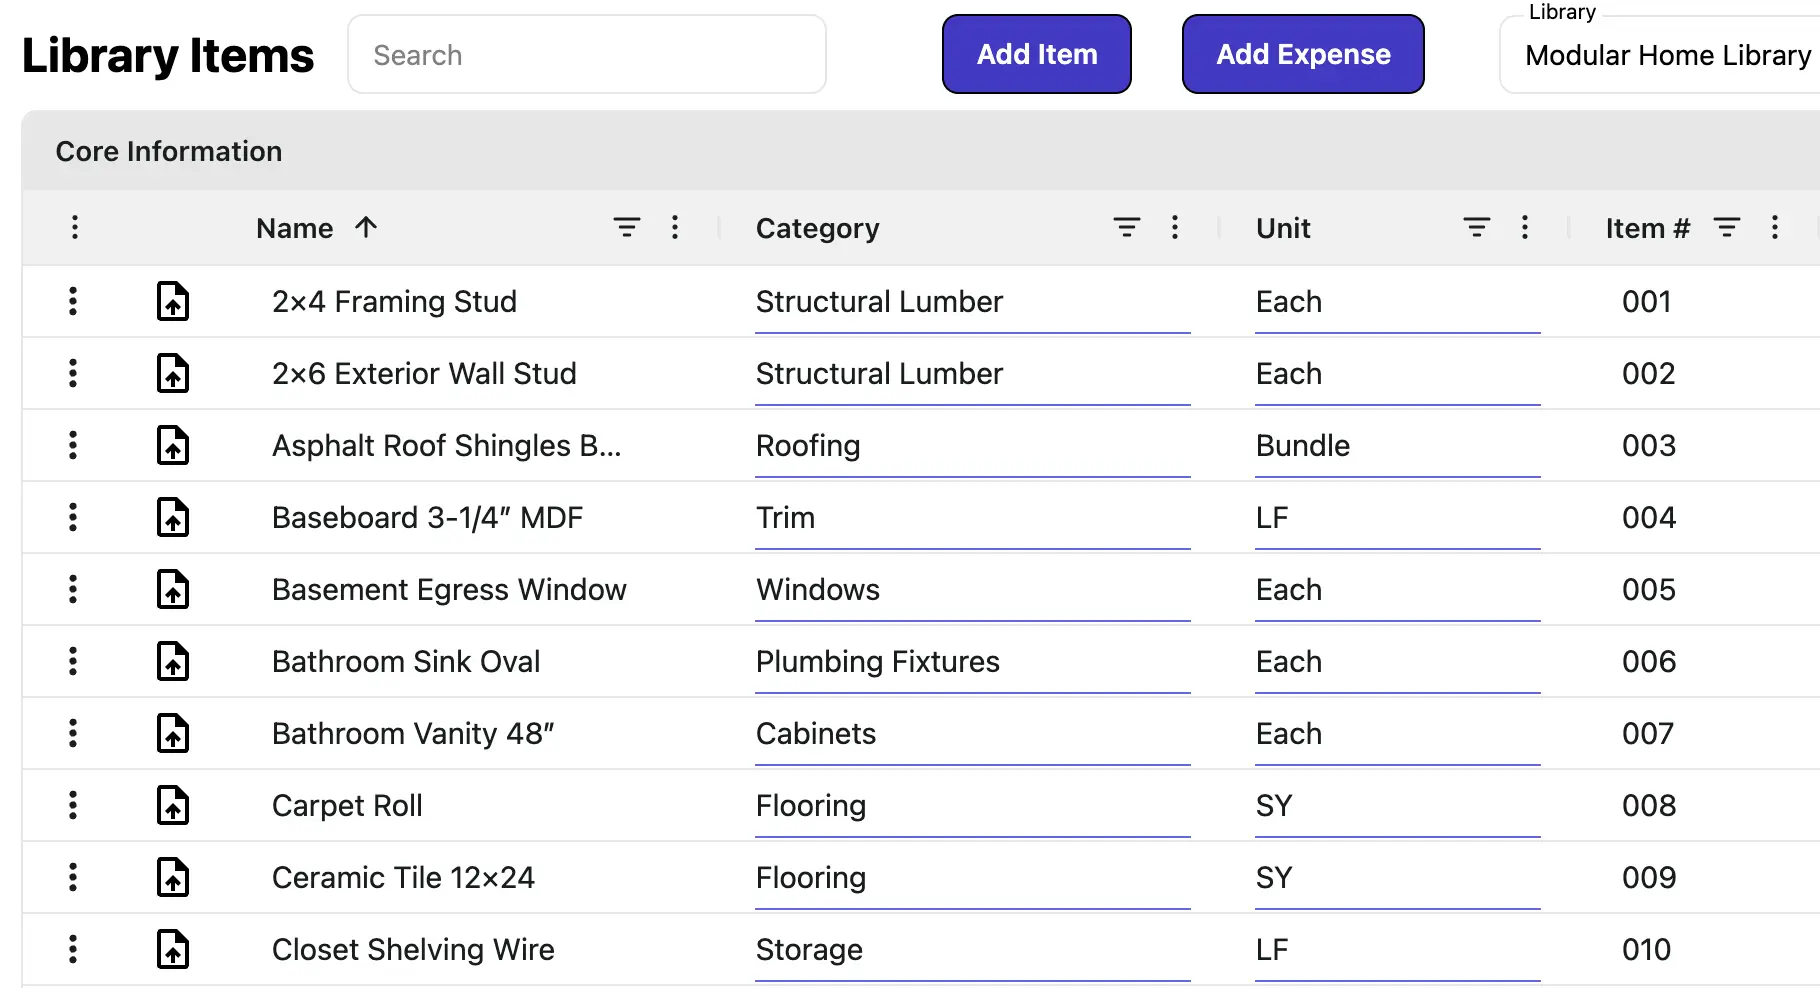
4. Manage Your Item Library and Tax Profiles
Before creating an estimate, make sure to set up your item library and tax profiles in the Library page.
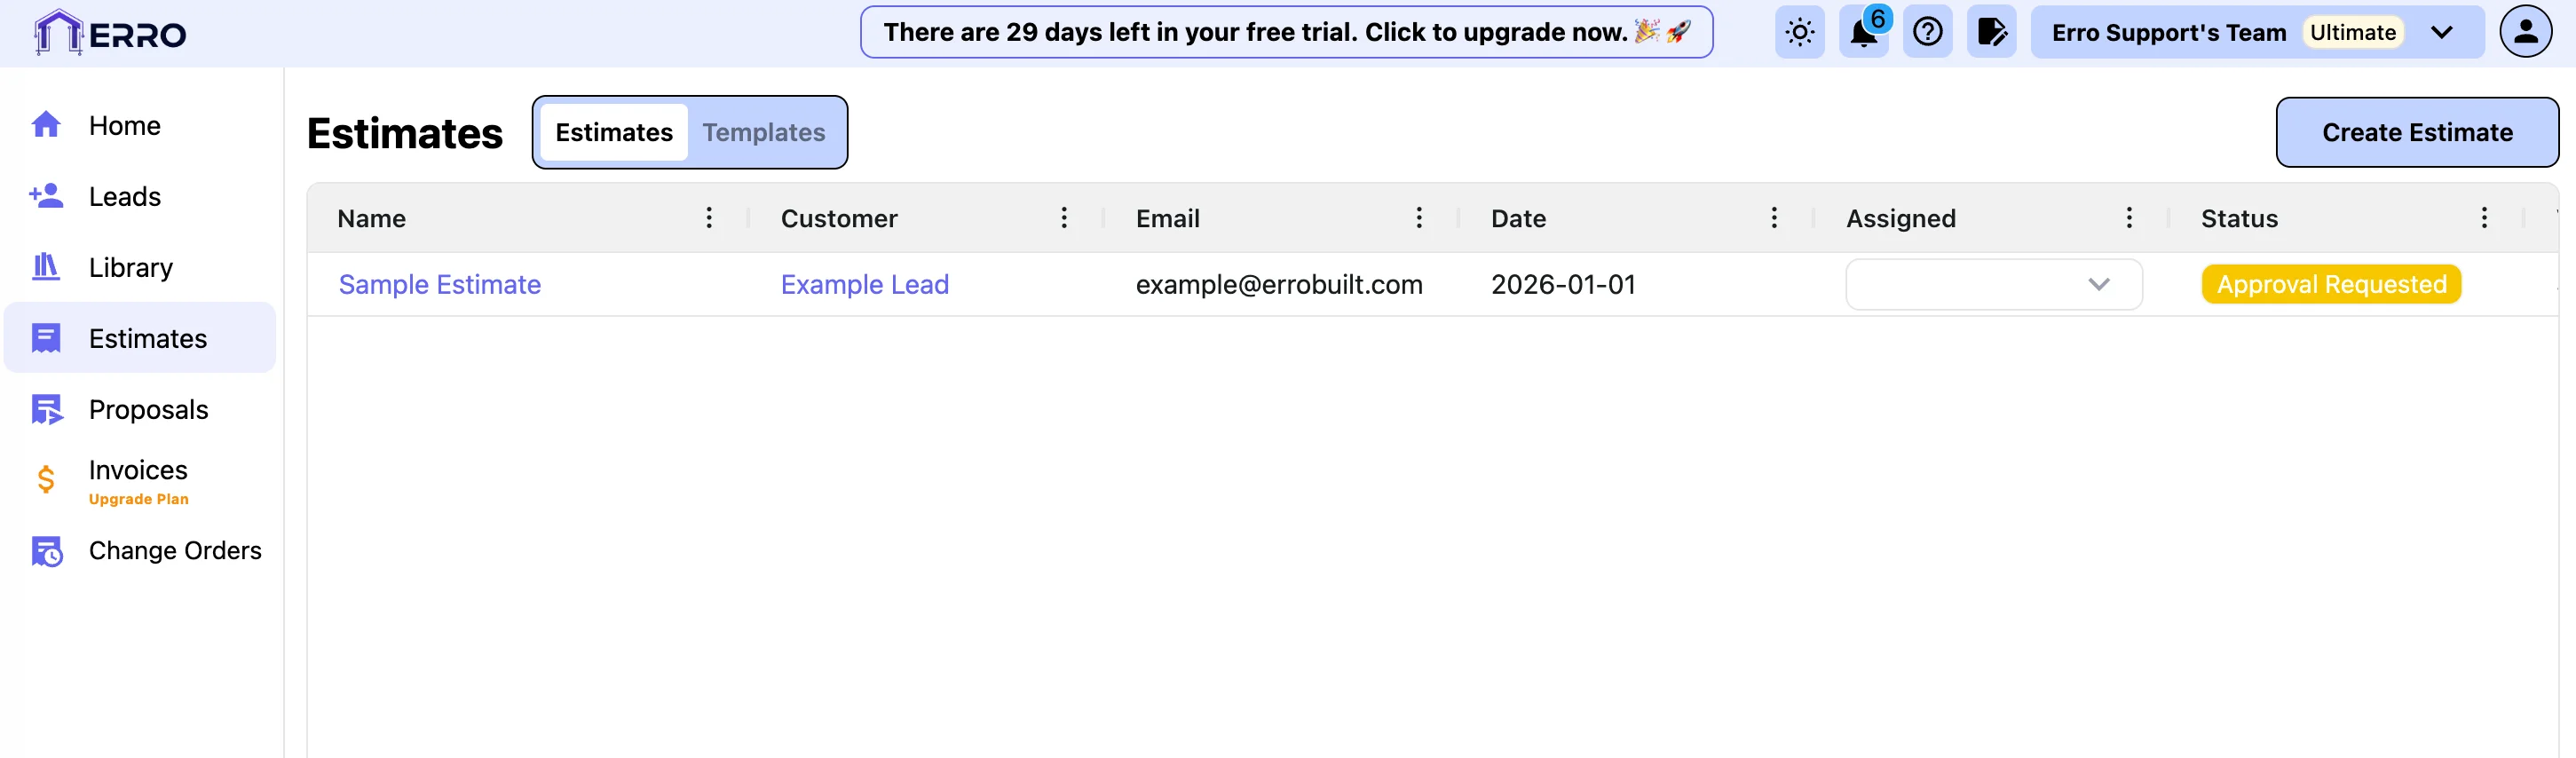
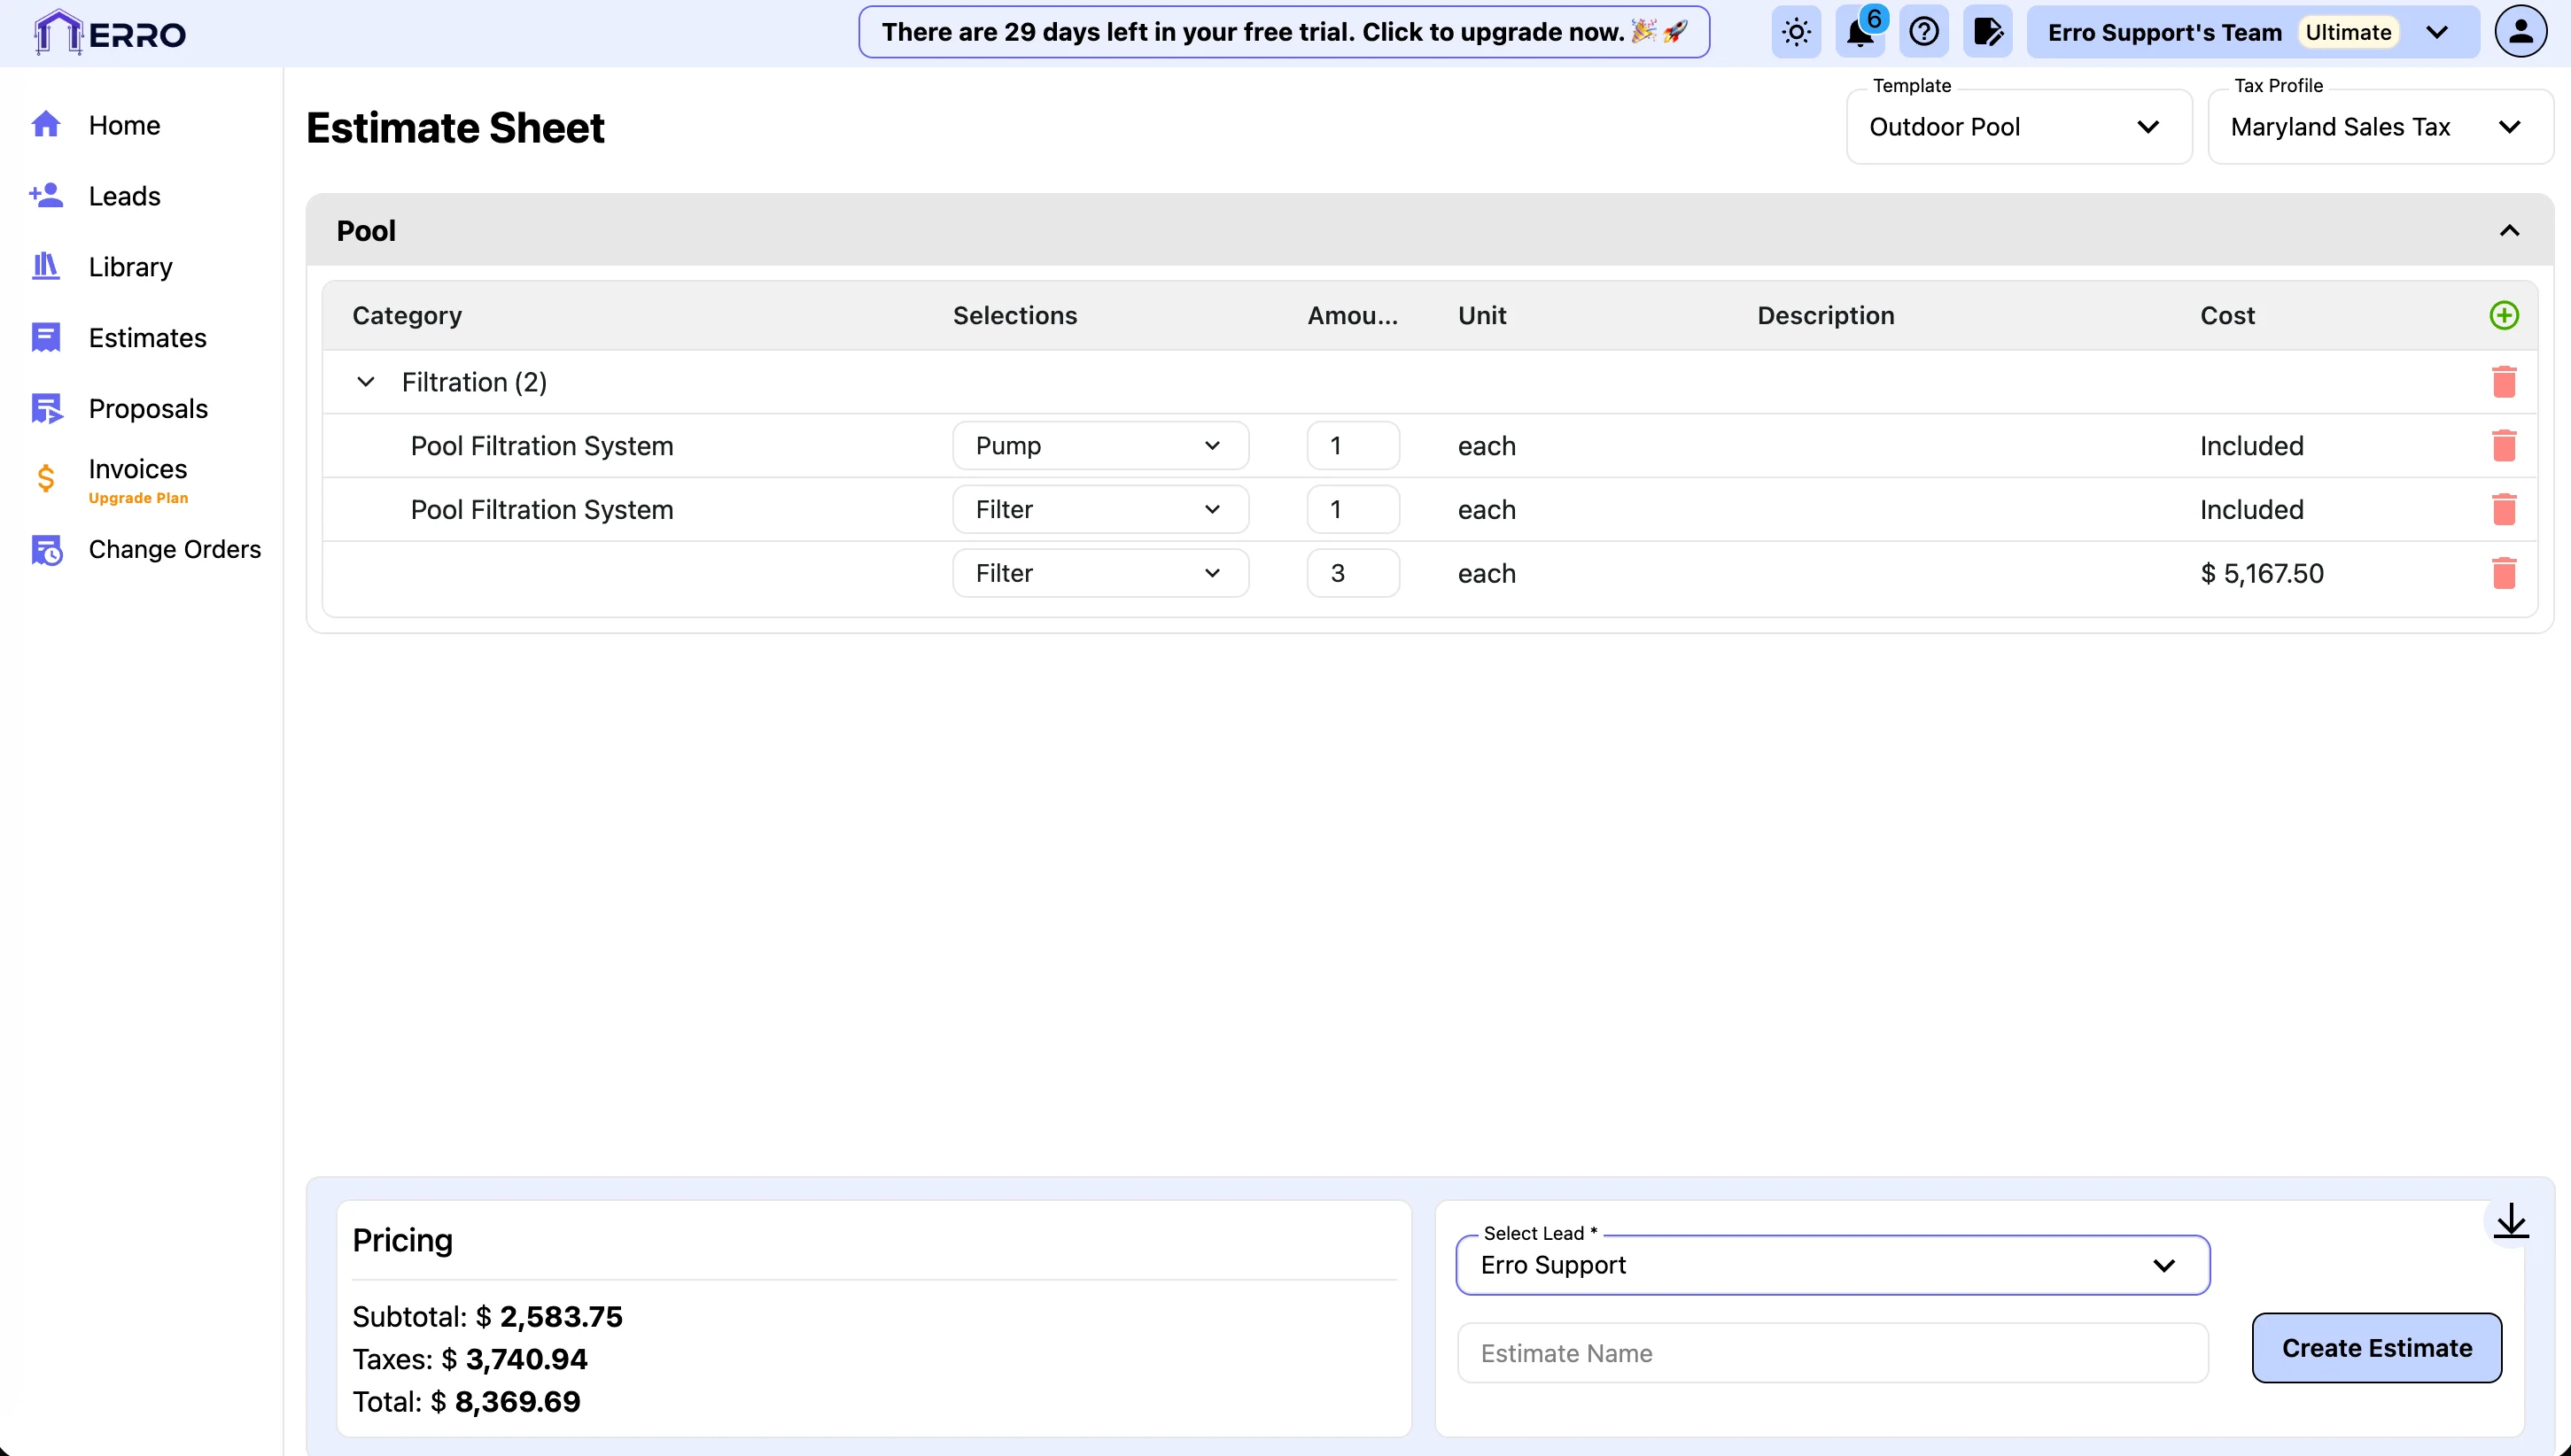
5. Create Estimate
Now that you have created a lead and added your items, you can now create an estimate. Start by navigating to the Estimates section and clicking on the 'Create Estimate' button.
6. Choose a template or modify the estimate manually
If you want to create an estimate from a template, select the template you wish to use from the list of templates. If you want to create an estimate manually, select the default template to start with a default estimate.
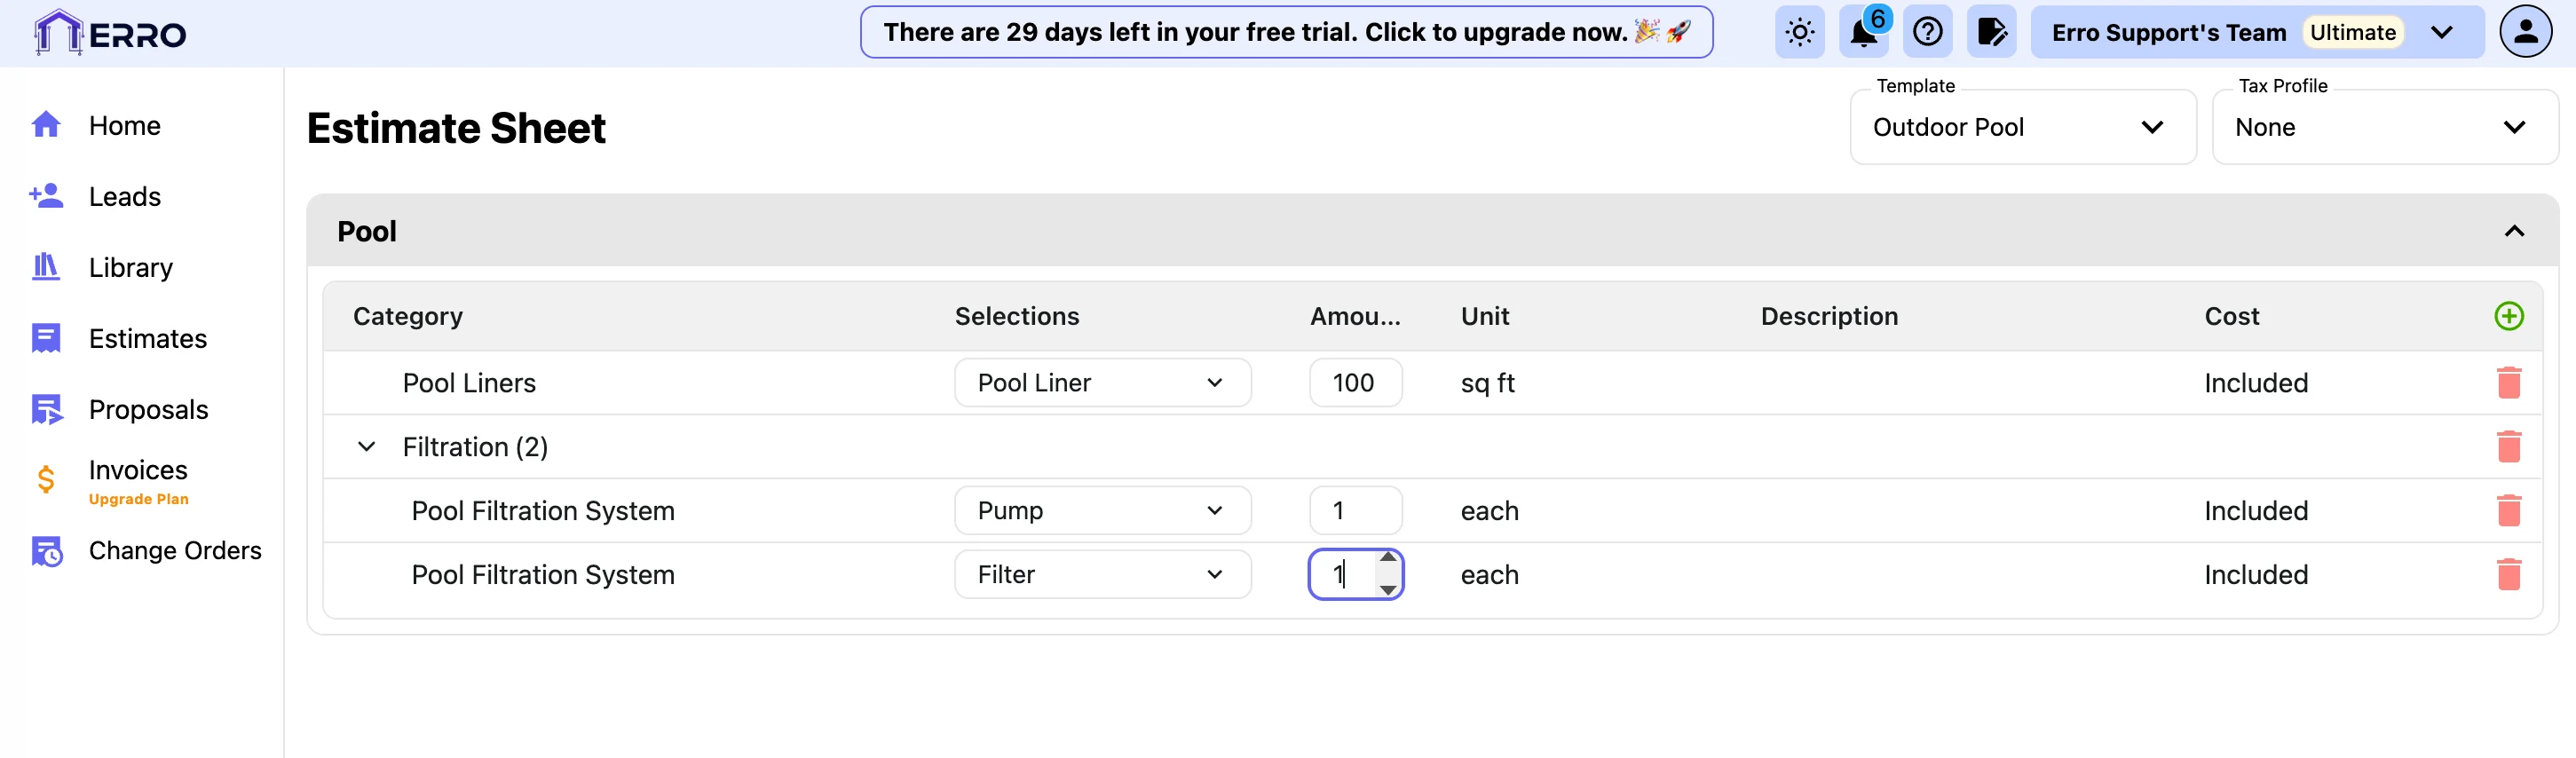
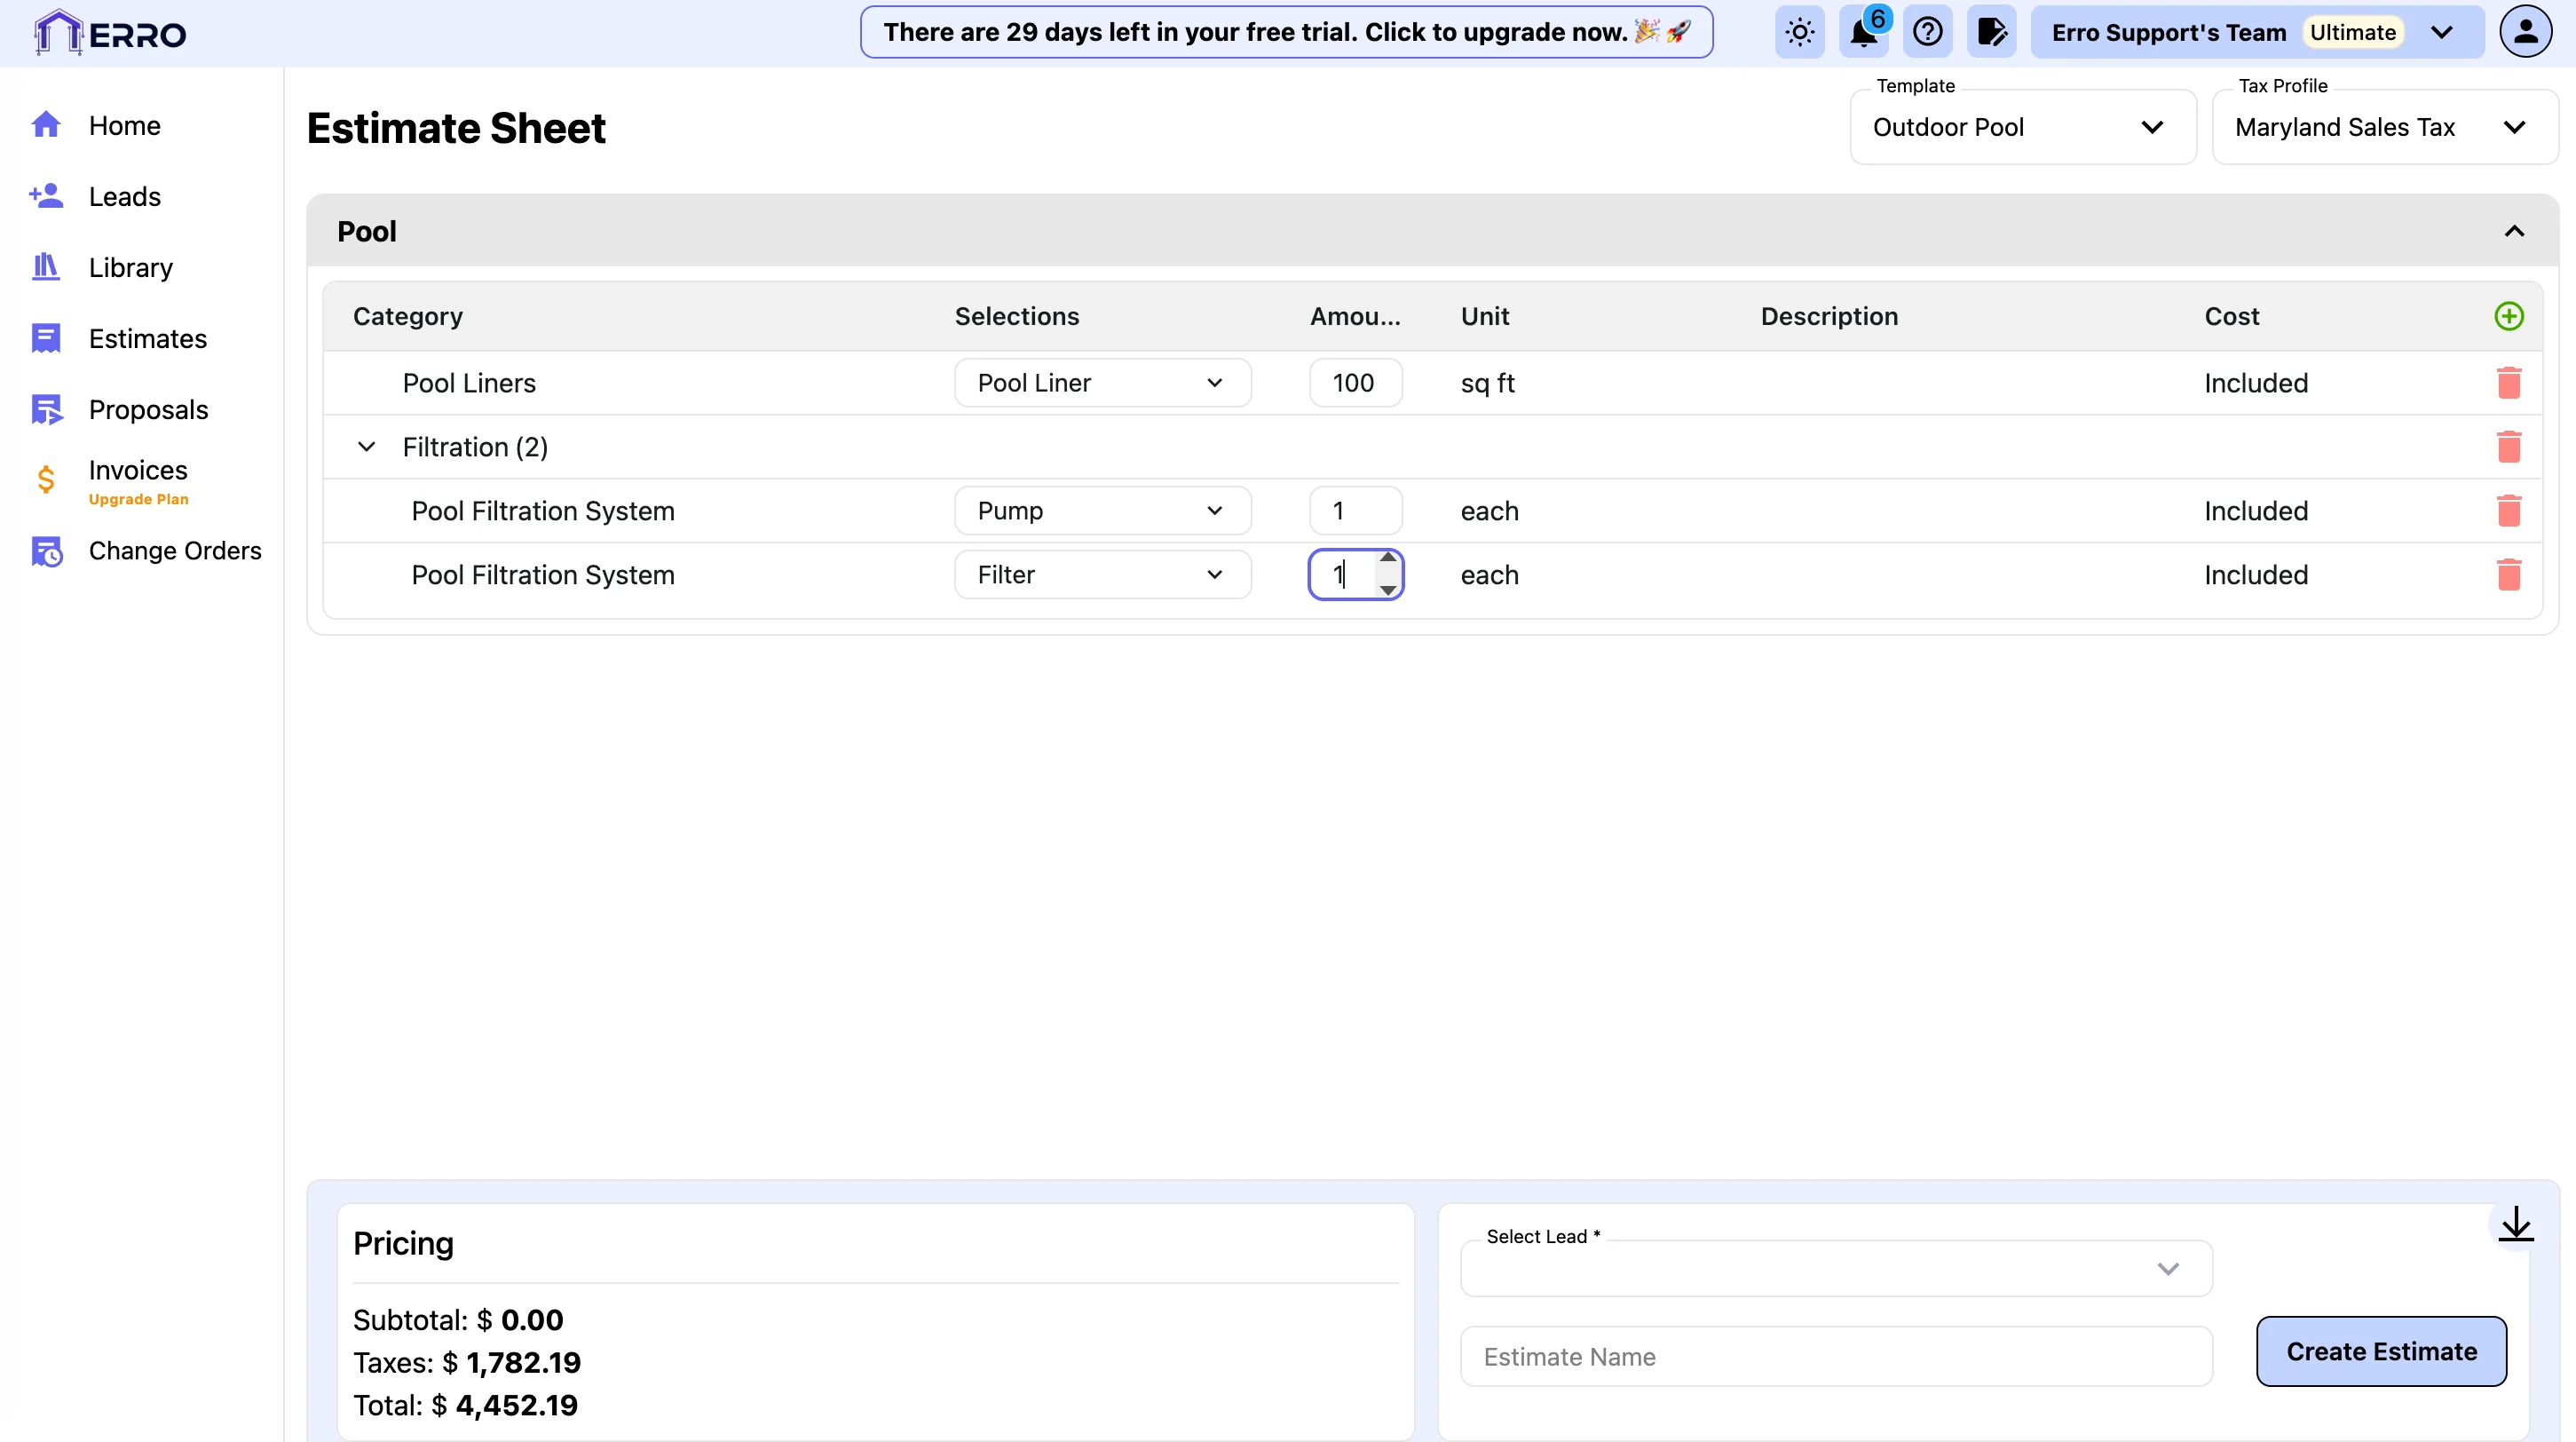
7. Assign a Tax Profile
Under the tax profile section, select the appropriate tax profile for your estimate.
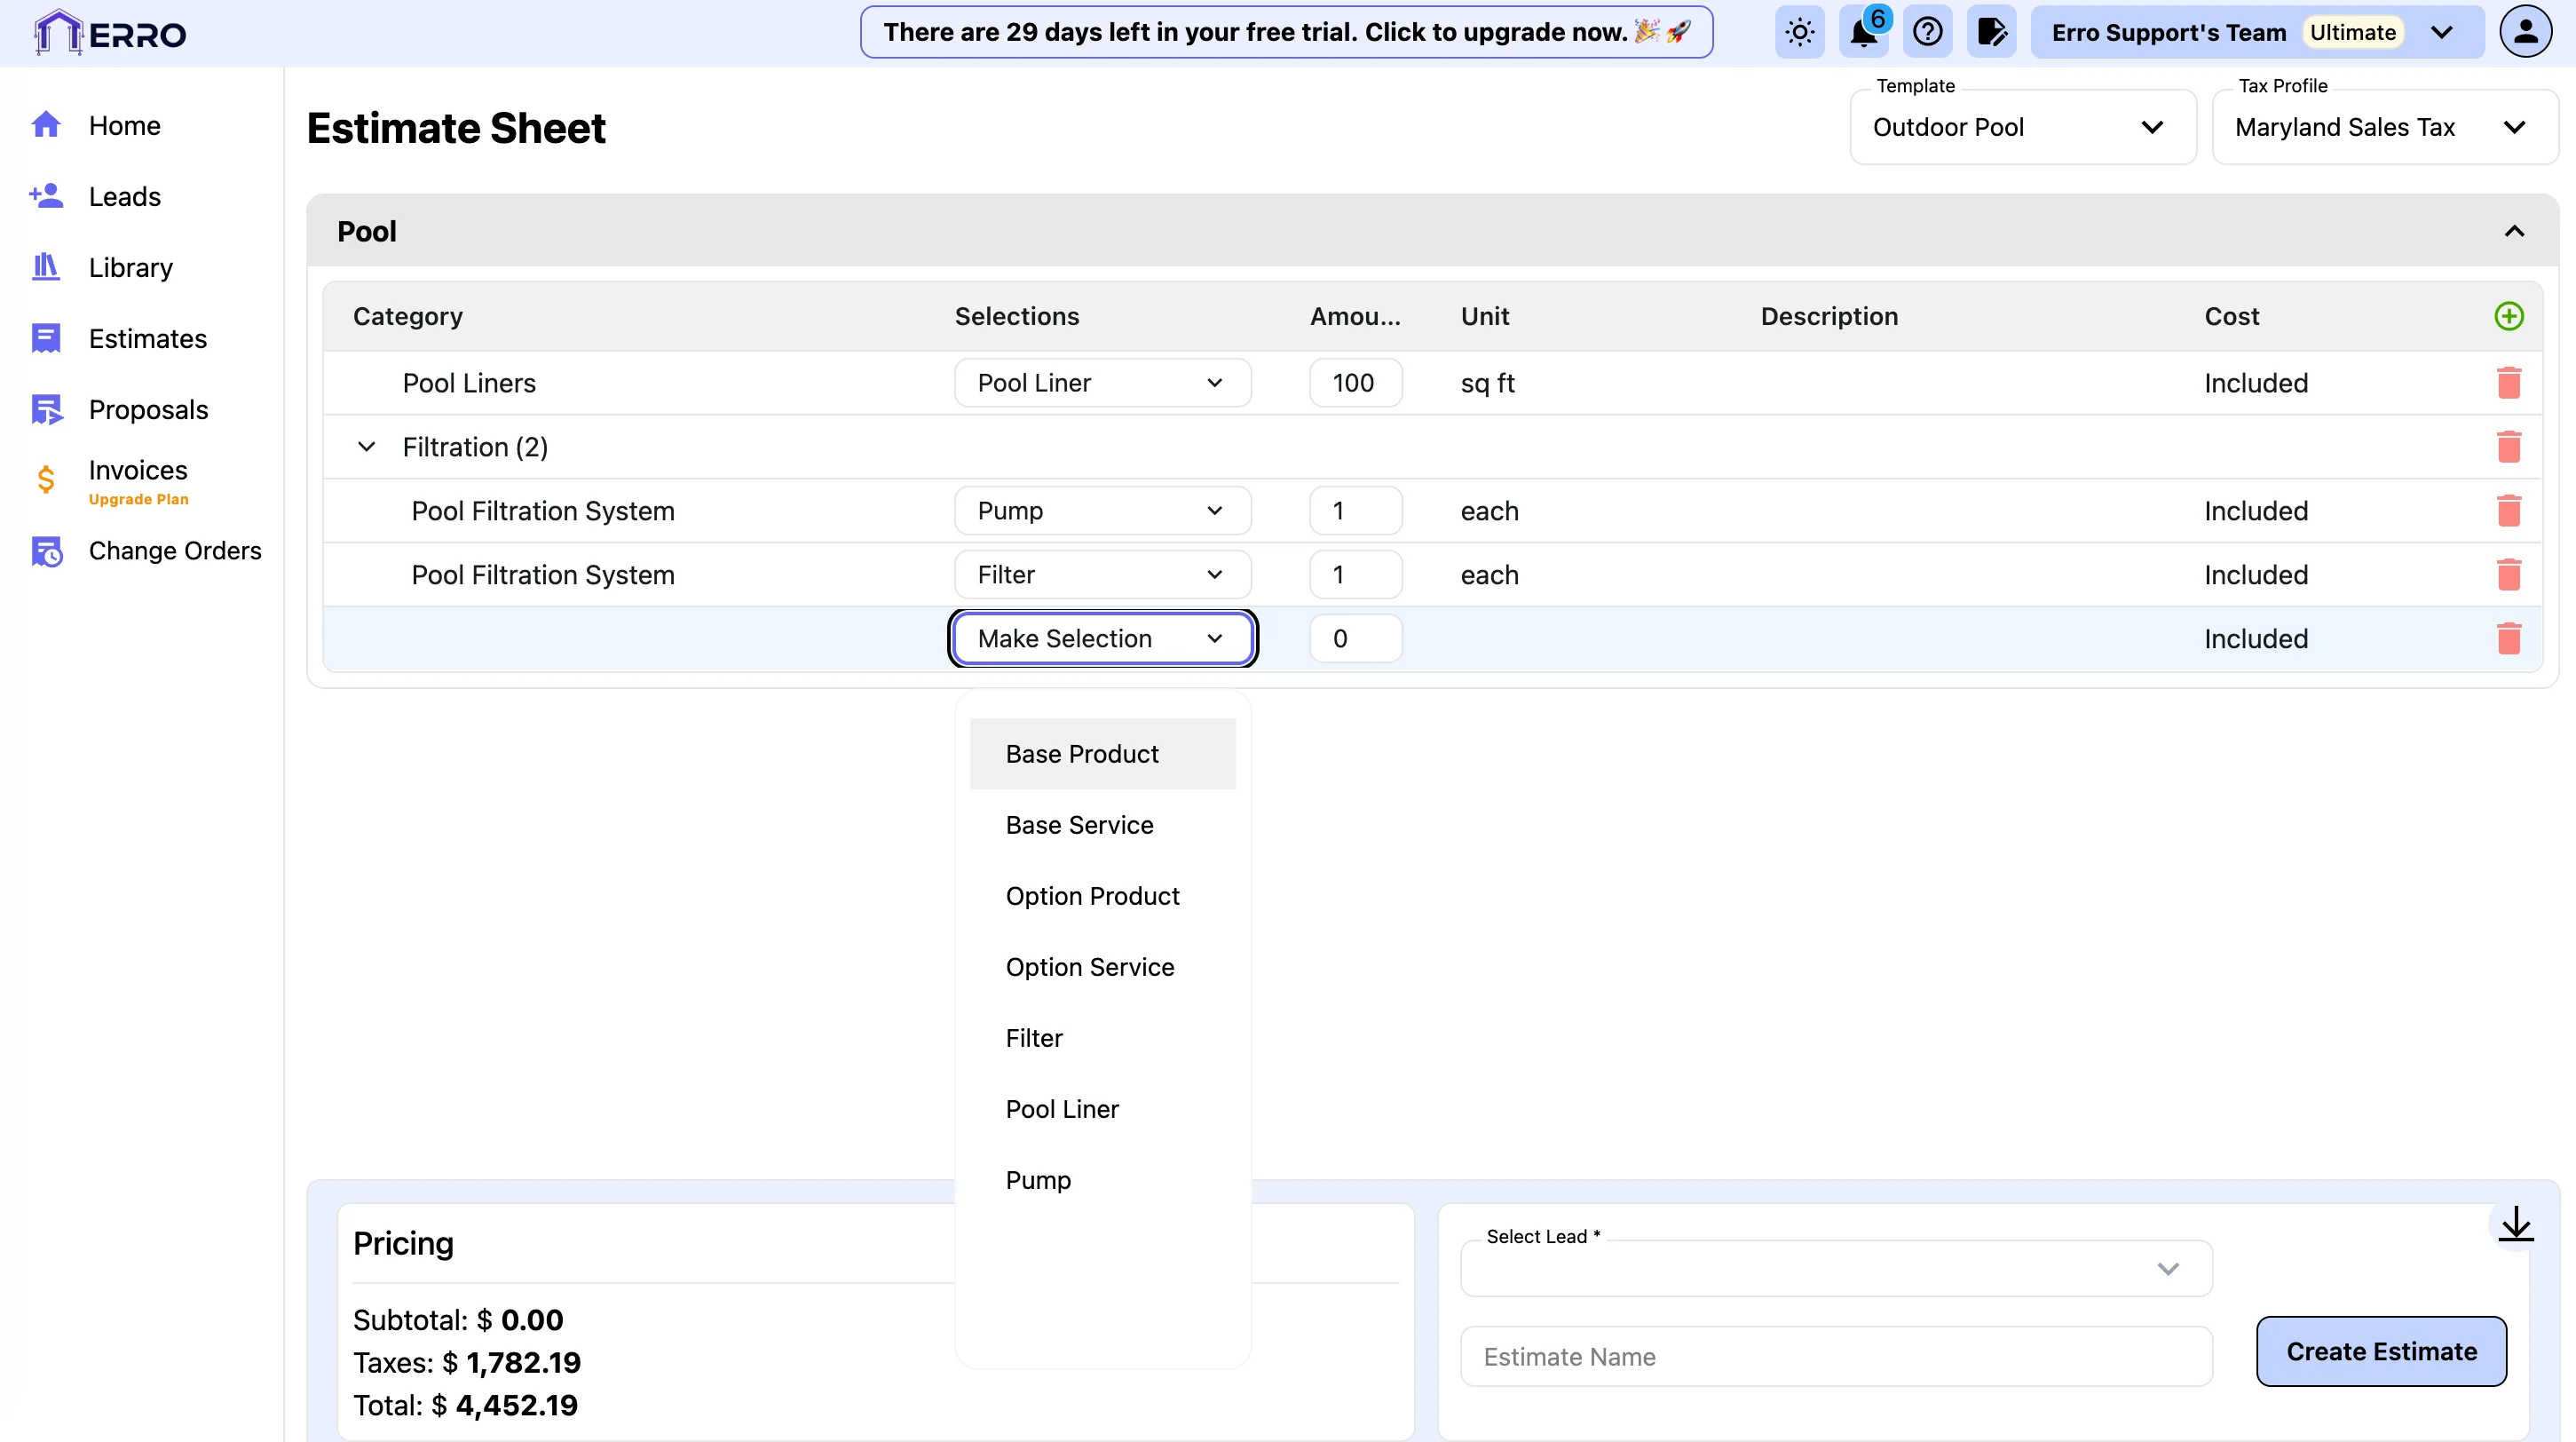
8. Manually add items to your estimate
To add items manually, click on the '+' button to the right of the 'Cost' column. Select an item from the drop down to add to the estimate.
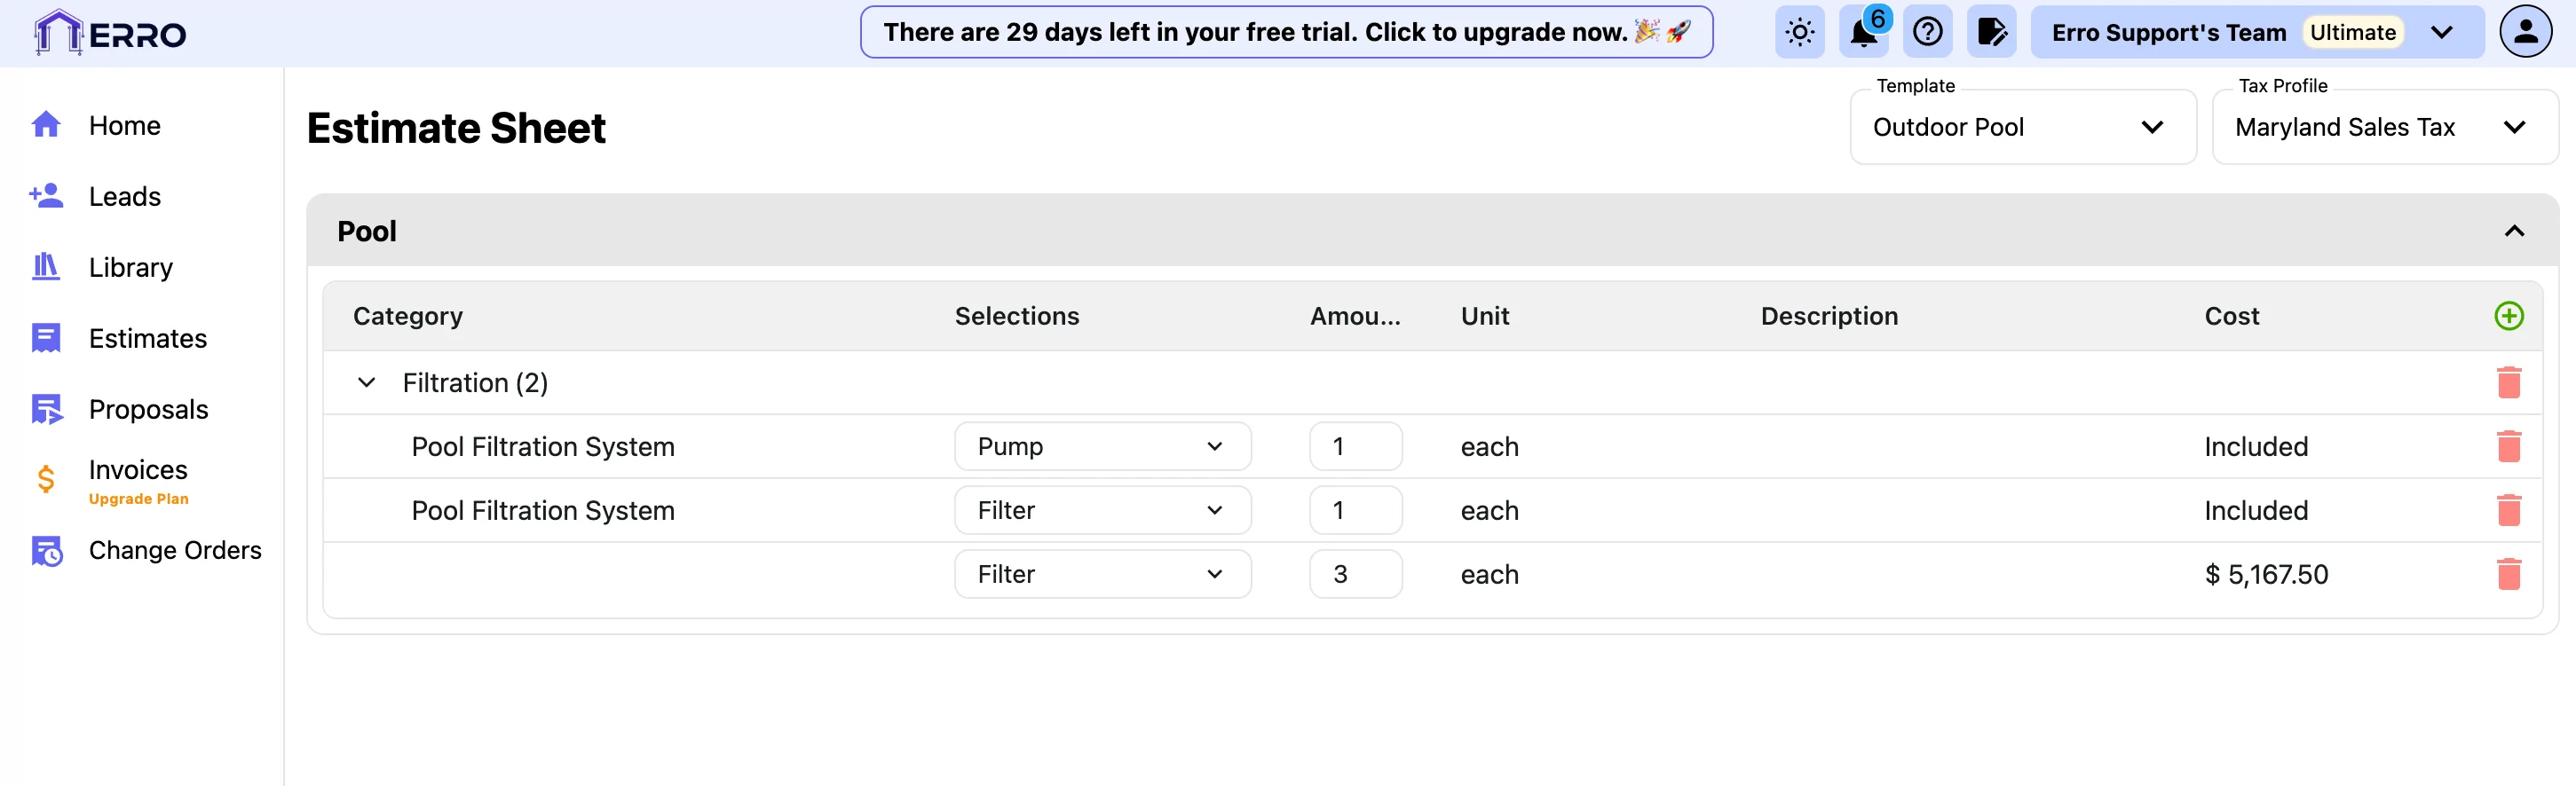
9. Delete items you don't need
To delete an item from your estimate, click on the trash can icon next to the item you wish to remove.
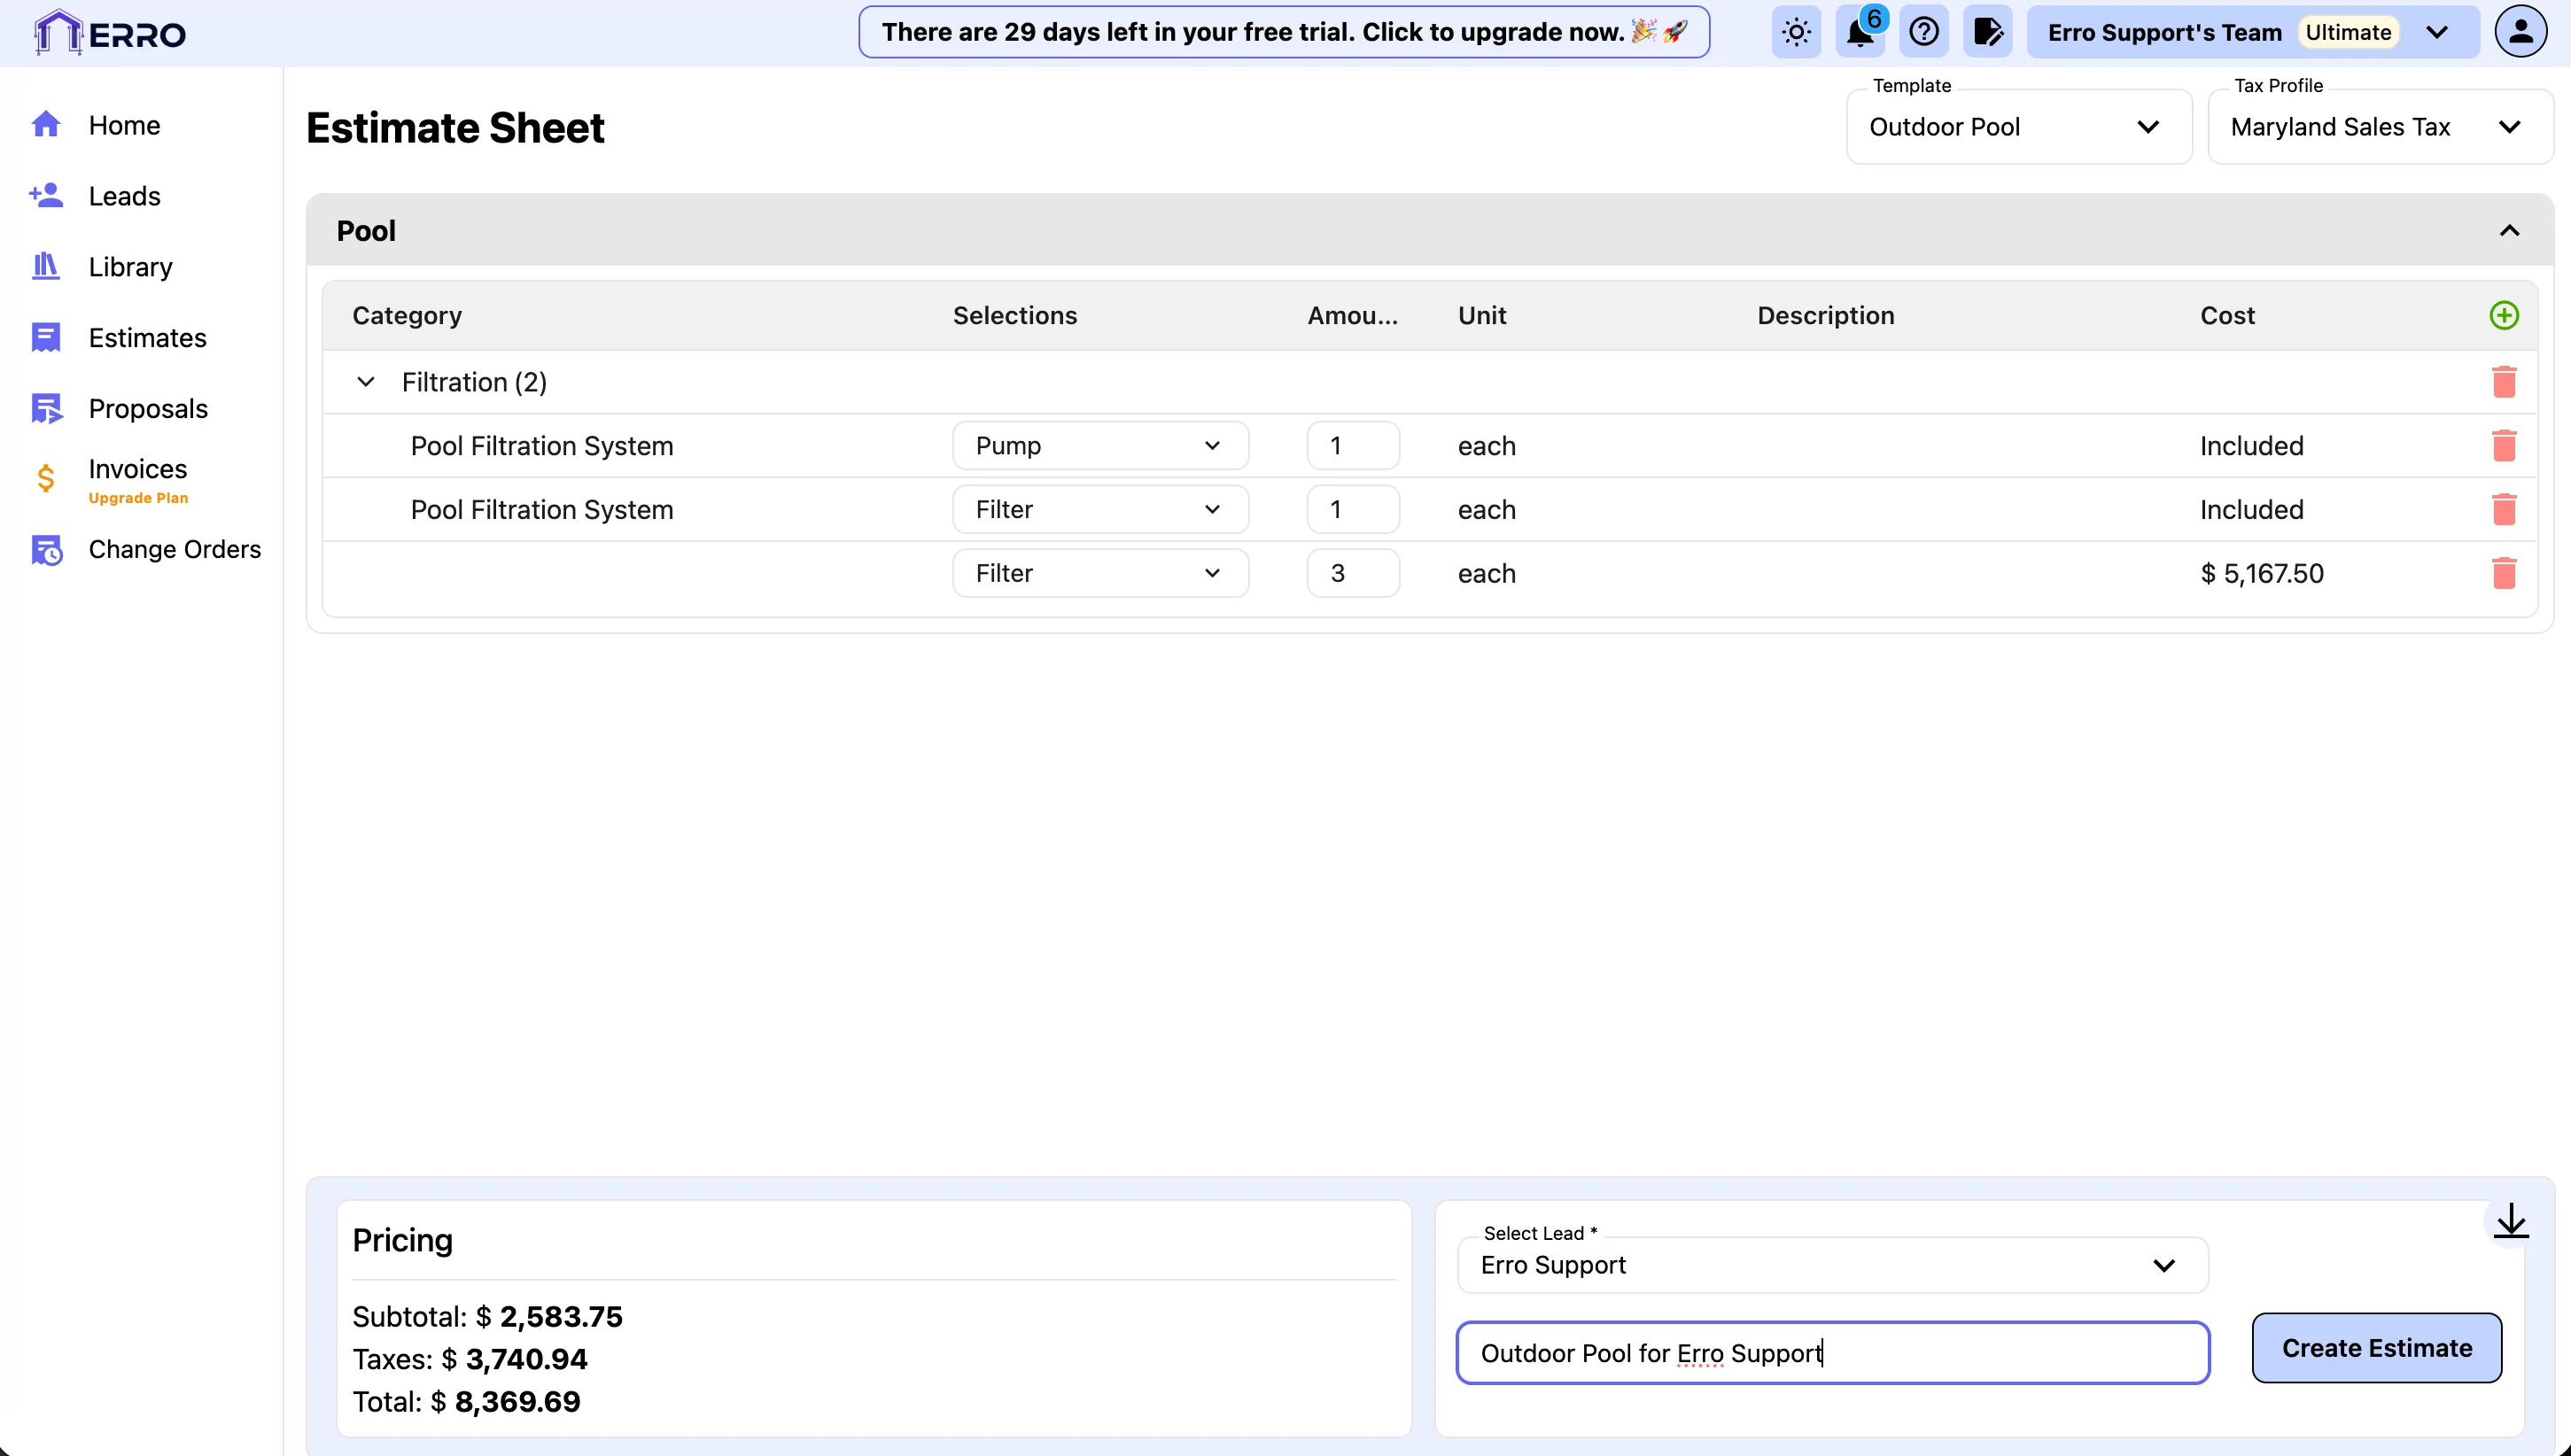
10. Assign Estimate to a Lead
To assign the estimate to a lead, click on the 'Select Lead' dropdown and select the appropriate lead from the list.
11. Add a Name to your Estimate and Click Create Estimate
Enter a name for your estimate in the 'Estimate Name' field and click the 'Create Estimate' button to save your estimate.
12. Create Your Propsal
Now the Estimate is ready to be sent to a client for approval. To do this, we need to create a Proposal. Start by navigating to the proposals section. If you wish to create a final proposal, click the 'Create Proposal' button in the top right corner. If you wish to create a draft proposal, click the 'Draft Proposals' tab and click 'Create Draft Proposal'.

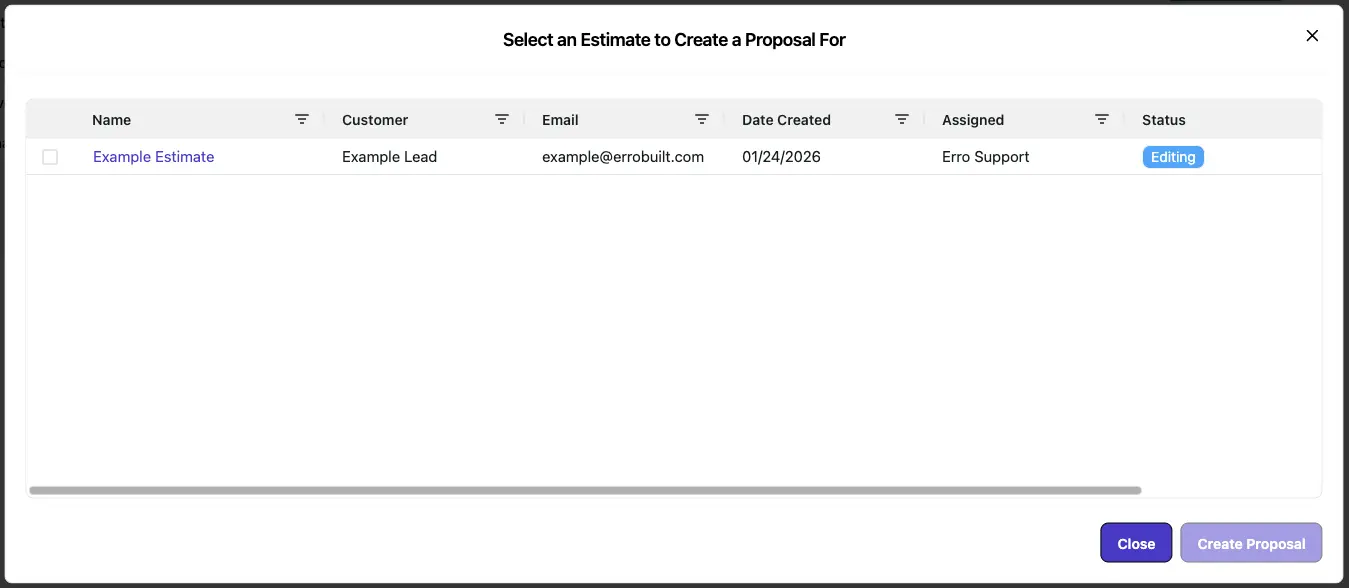
13. Select the Estimate
Select an estimate or change order to create a proposal from, then click create proposal in the bottom right corner.
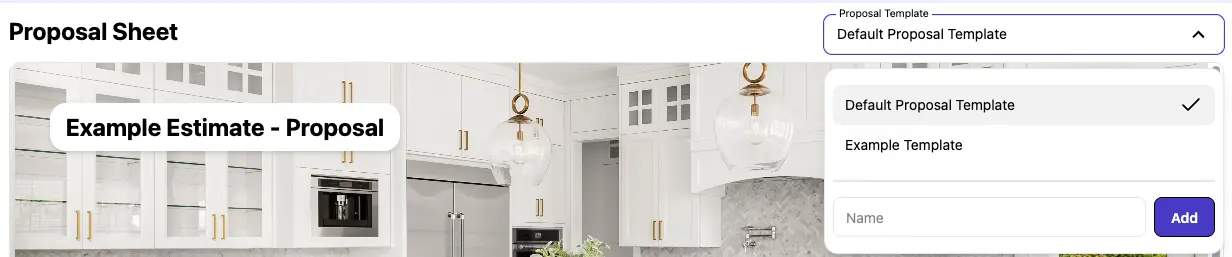
14. Choose a Proposal Template
Select a proposal template that you wish to use for the proposal from the selector in the top right corner.
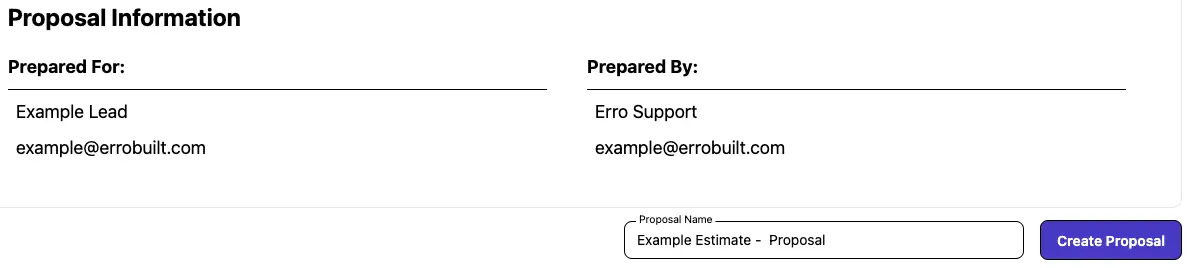
15. Name and Create Your Proposal
Enter a name for your proposal to help you identify it later. Then click the 'Create Proposal' button to create the proposal.
16. Your Proposal is Created
Return to the proposals section to view your newly created proposal.

17. Send Proposal to Client
To get the proposal approved, we need to send it to the client. Click on the proposal's name to open its details page.

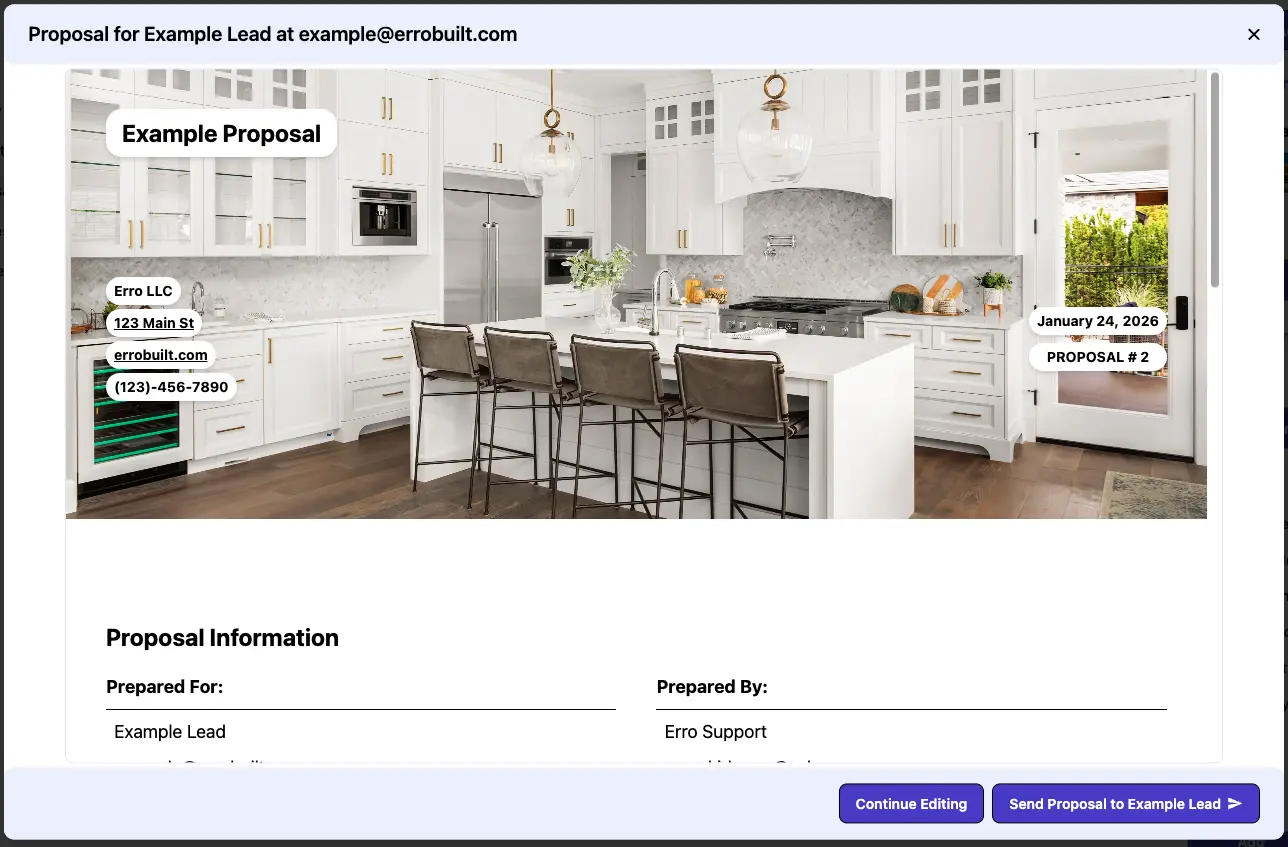
18. Send the Proposal
From the Proposal page, click the 'Send Proposal' button. This will generate a preview popup of the proposal. Review the preview and confirm to send the proposal to the intended recipient.
19. View Proposal Status
Once the proposal has been signed by the customer, it will update the proposal status on the proposal details page.

20. View Invoices
Once the proposal has been signed by the customer, you are able to create an invoice to bill the customer. Start by navigating to the invoices section to see all your created invoices. To create a new invoice, click the 'Create Invoice' button in the top right corner.

21. Create an Invoice
Select the Proposal. Fill in a name for the invoice and click 'Create Invoice'.

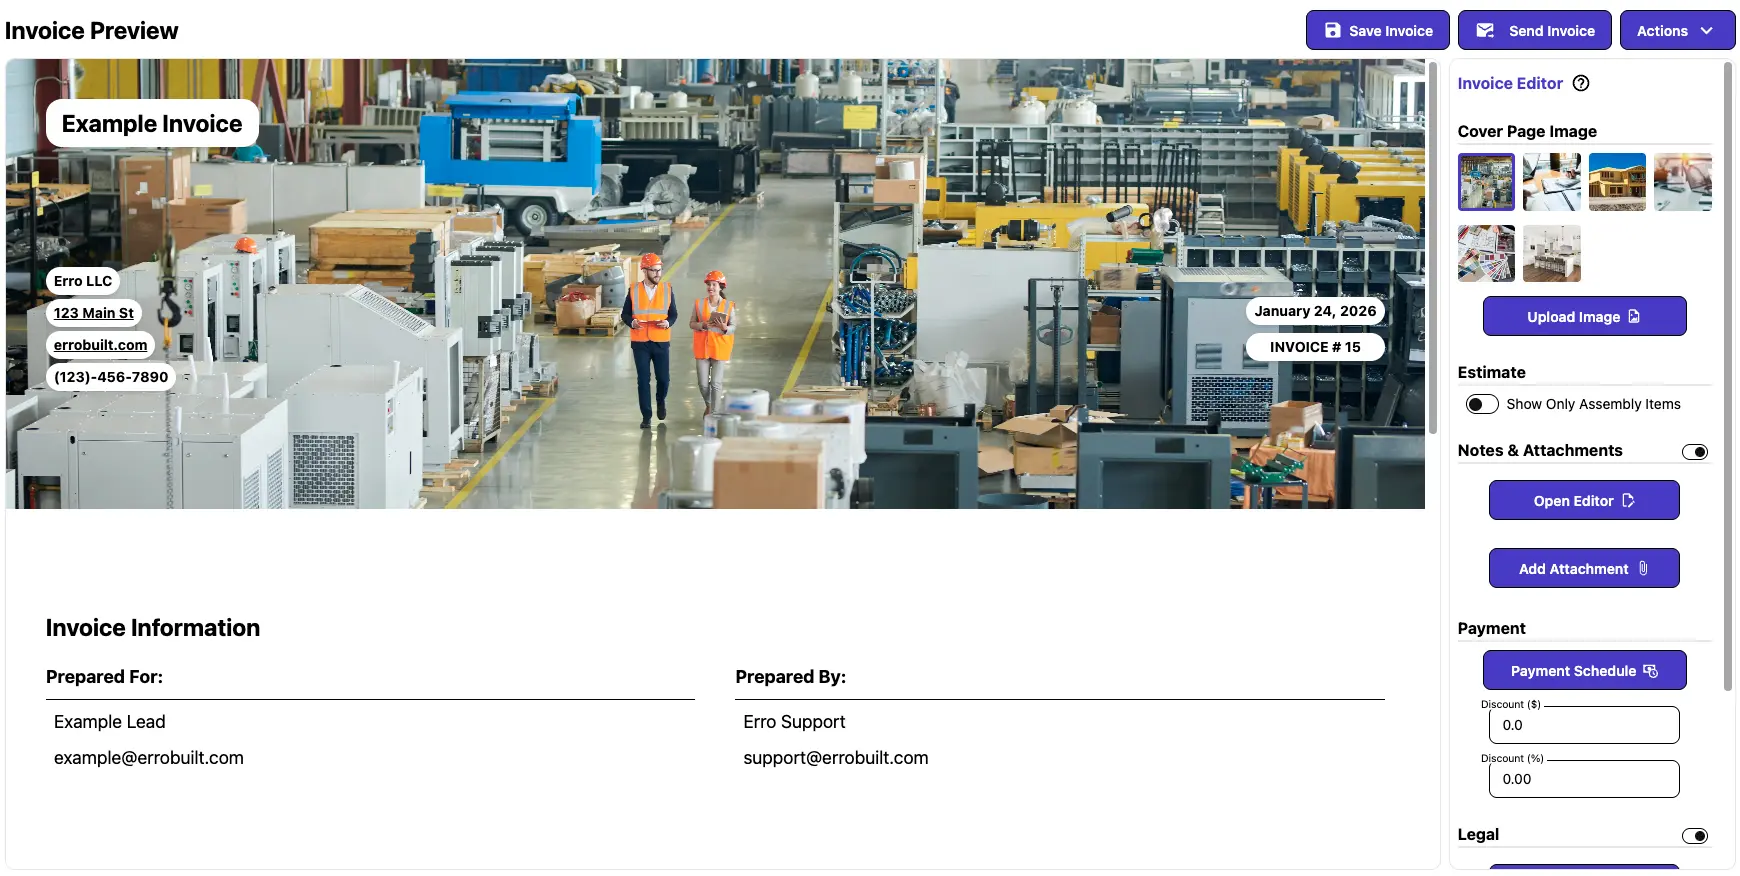
22. View Your Invoice
After creating an invoice, the preview of the invoice will be displayed. You can review the details and make any necessary adjustments before sending it to your client.
Other Getting Started Articles
Explore more articles to help you get the most out of Erro.
Account Setup
Get started with your new account.
Erro Support
Mobile Setup
Learn how to set up your mobile device for optimal use.
Erro Support