Return to All Articles
Article Sections
1. Getting Started
2. Leads
3. Library
4. Sales Template
5. Estimate
6. Proposal
7. Invoice
8. Change Order
9. Organization Management
10. Team Management
Create a Sales Template
Learn how to create a sales template step-by-step.
By Erro Support | 01/25/2026
1. Create a New Sales Template
Go to the Estimates page and switch to the 'Template' tab. Click on the drop down under template enter a name and press 'Add'.
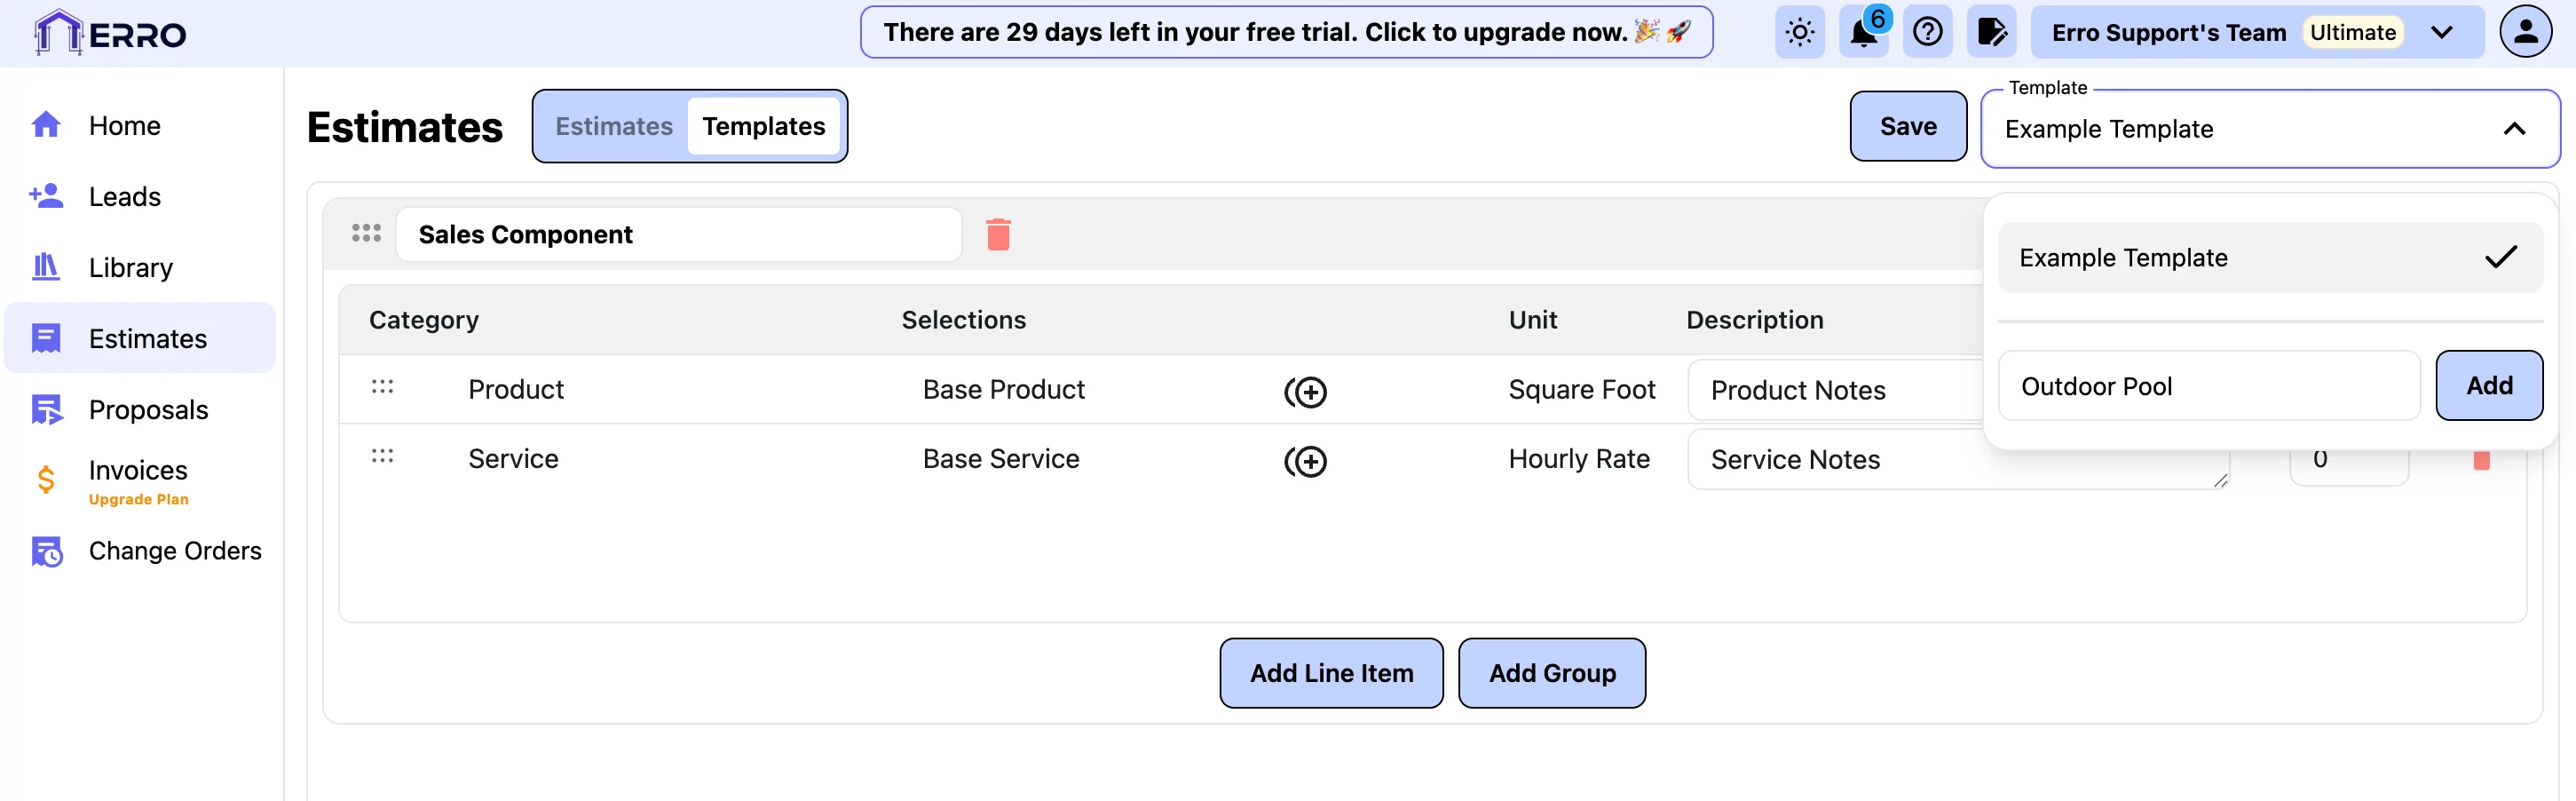
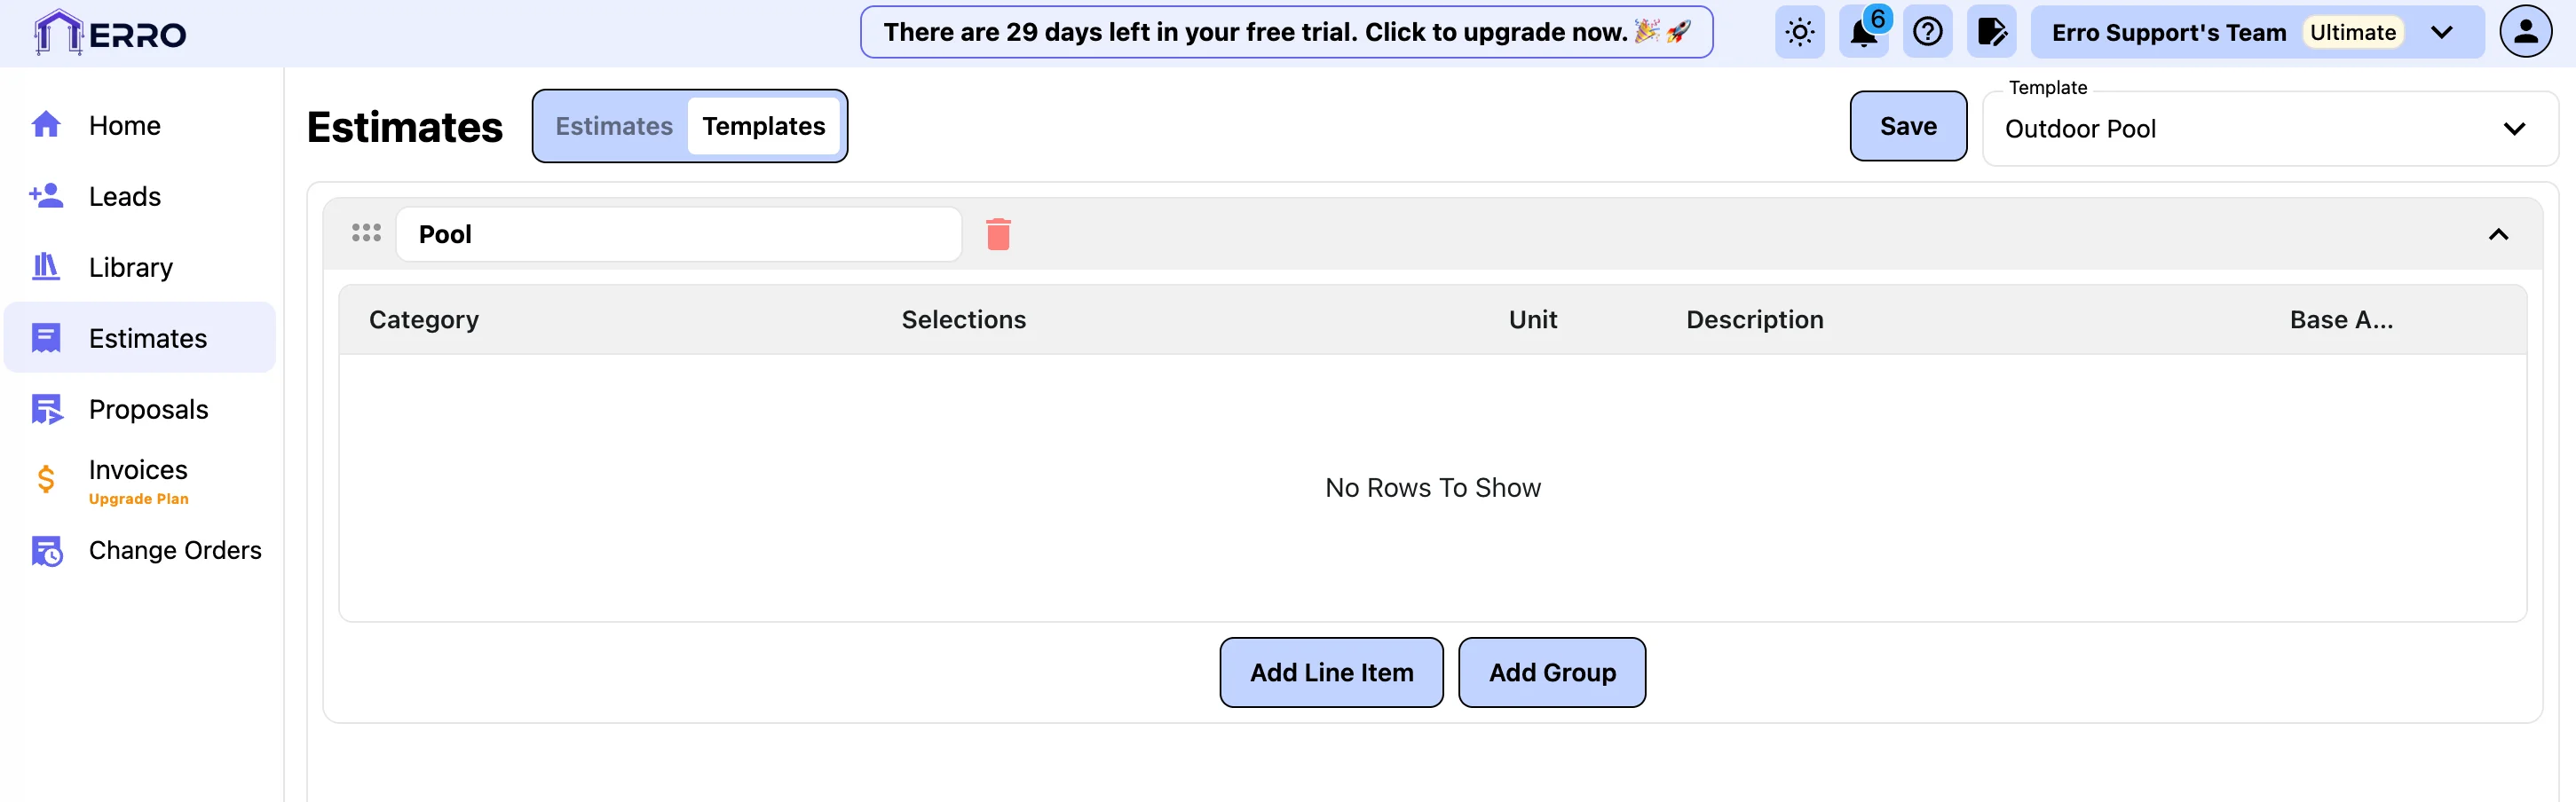
2. Add a Sales Assembly
Open the template you just created and click on 'Add Sales Assembly'. Enter a name for the sales assembly.
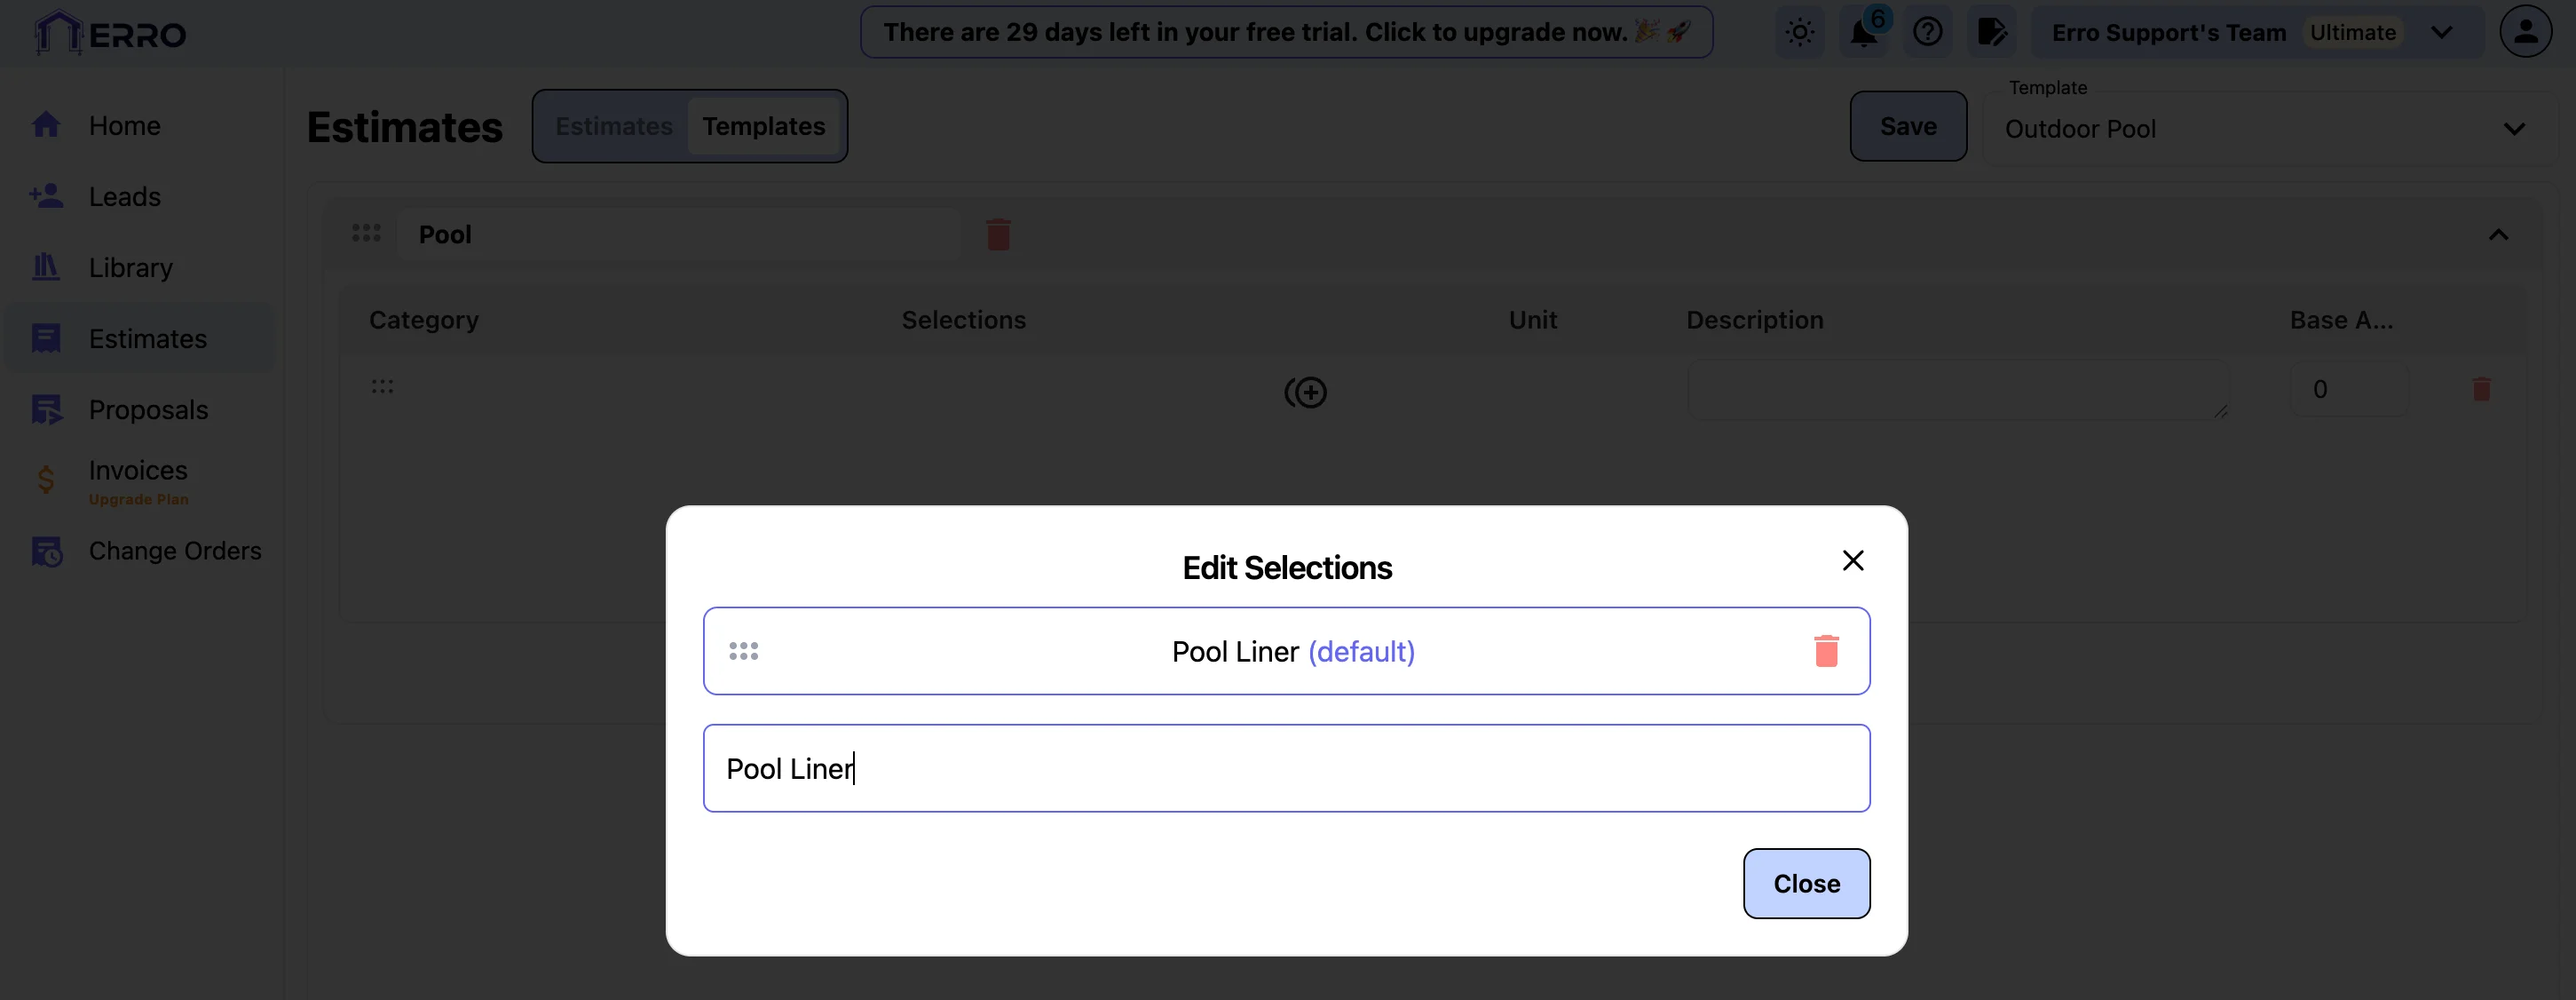
3. Add a Line Item to the Sales Assembly
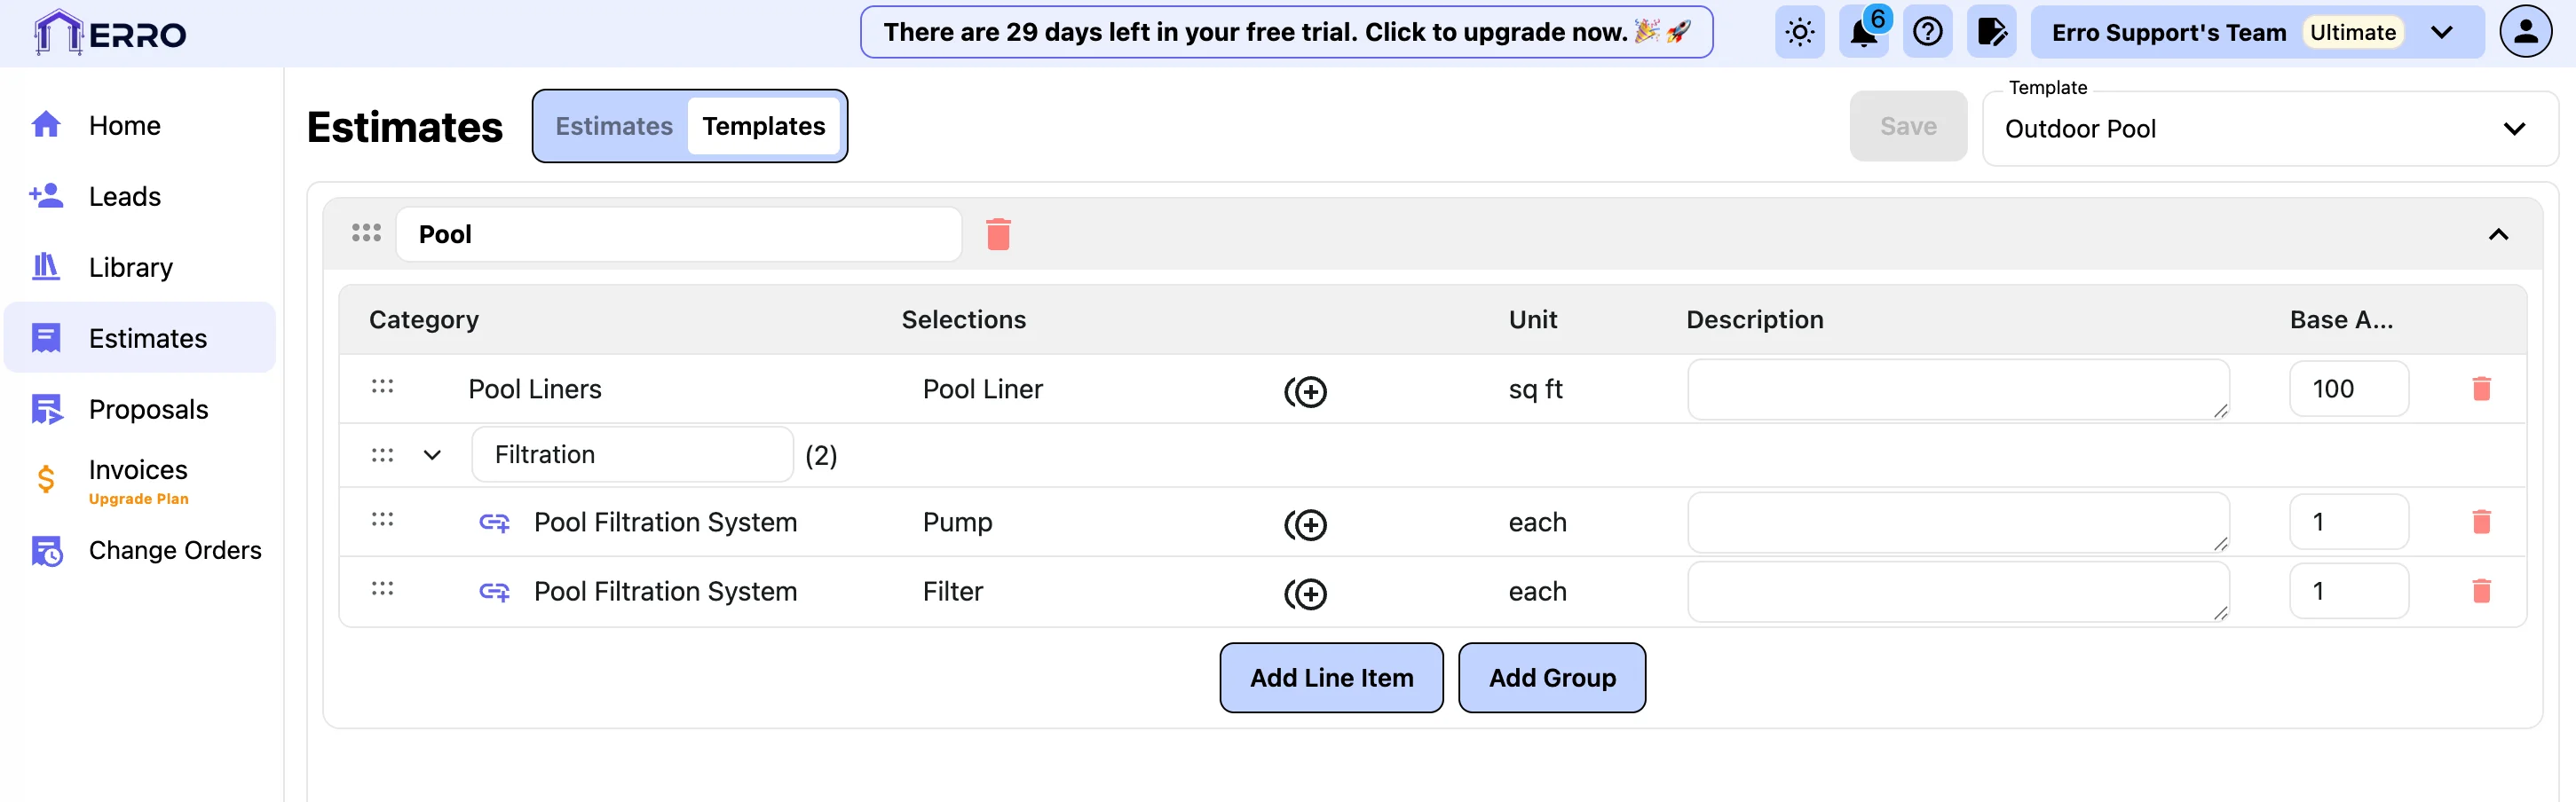
Inside the sales assembly, click on 'Add Line Item'. Click the '+' under the 'Selections' column and choose the item you want to add. You can also add a description or base amount for the item.
4. Add a Group to the Sales Assembly
To organize your line items, you can add groups within the sales assembly. Click on 'Add Group', enter a name for the group, and then add line items to this group as needed. You call also drag and drop line items into the group.
5. Save the Sales Template
Once you've added all desired sales assemblies and line items, make sure to save your sales template. You can now use this template for future estimates to streamline your sales process.
There are not related articles available. Please return to the main help page for other help articles